Molding and Casting
For this week's assignment, It was required to design a 3D mold, machine it, and cast parts from it.
Introduction:
Molding is the process of manufacturing by shaping liquid or pliable raw material using a rigid frame called a mold or matrix.[1] This itself may have been made using a pattern or model of the final object. Casting is the opposite manufacturing process, in which a liquid material is usually poured into a mold, which contains a hollow cavity of the desired shape, and then, when solidified, is ejected or broken out of the mold to complete the process.
Getting to work:
For this week, I chose to design a wine glass.It was a random idea,but when i thought about how to mold and cast it was kind of total confusion.The main confusion was how to cast the main part of a glass without making it a solid filled model.
Inorder to cast the glass in its original shape we need to mill three parts.
Actually the positive of a wine glass can be milled just in 2 portions,but the 3rd part is the main challanging portion to be done.
The Mold:
Generally, to design the mold, you do one of these 2 ways:
-
Machine the positive of the mold (The actual product you want) and then cast the mold using silicon rubber.
Machine the negative of the mold directly.
I decided to go for the first method to try the silicon rubber casting.
First step, I used 3ds max to design the wine glass.
For the cast, i designed a simple wine glass
Designing 3D mold
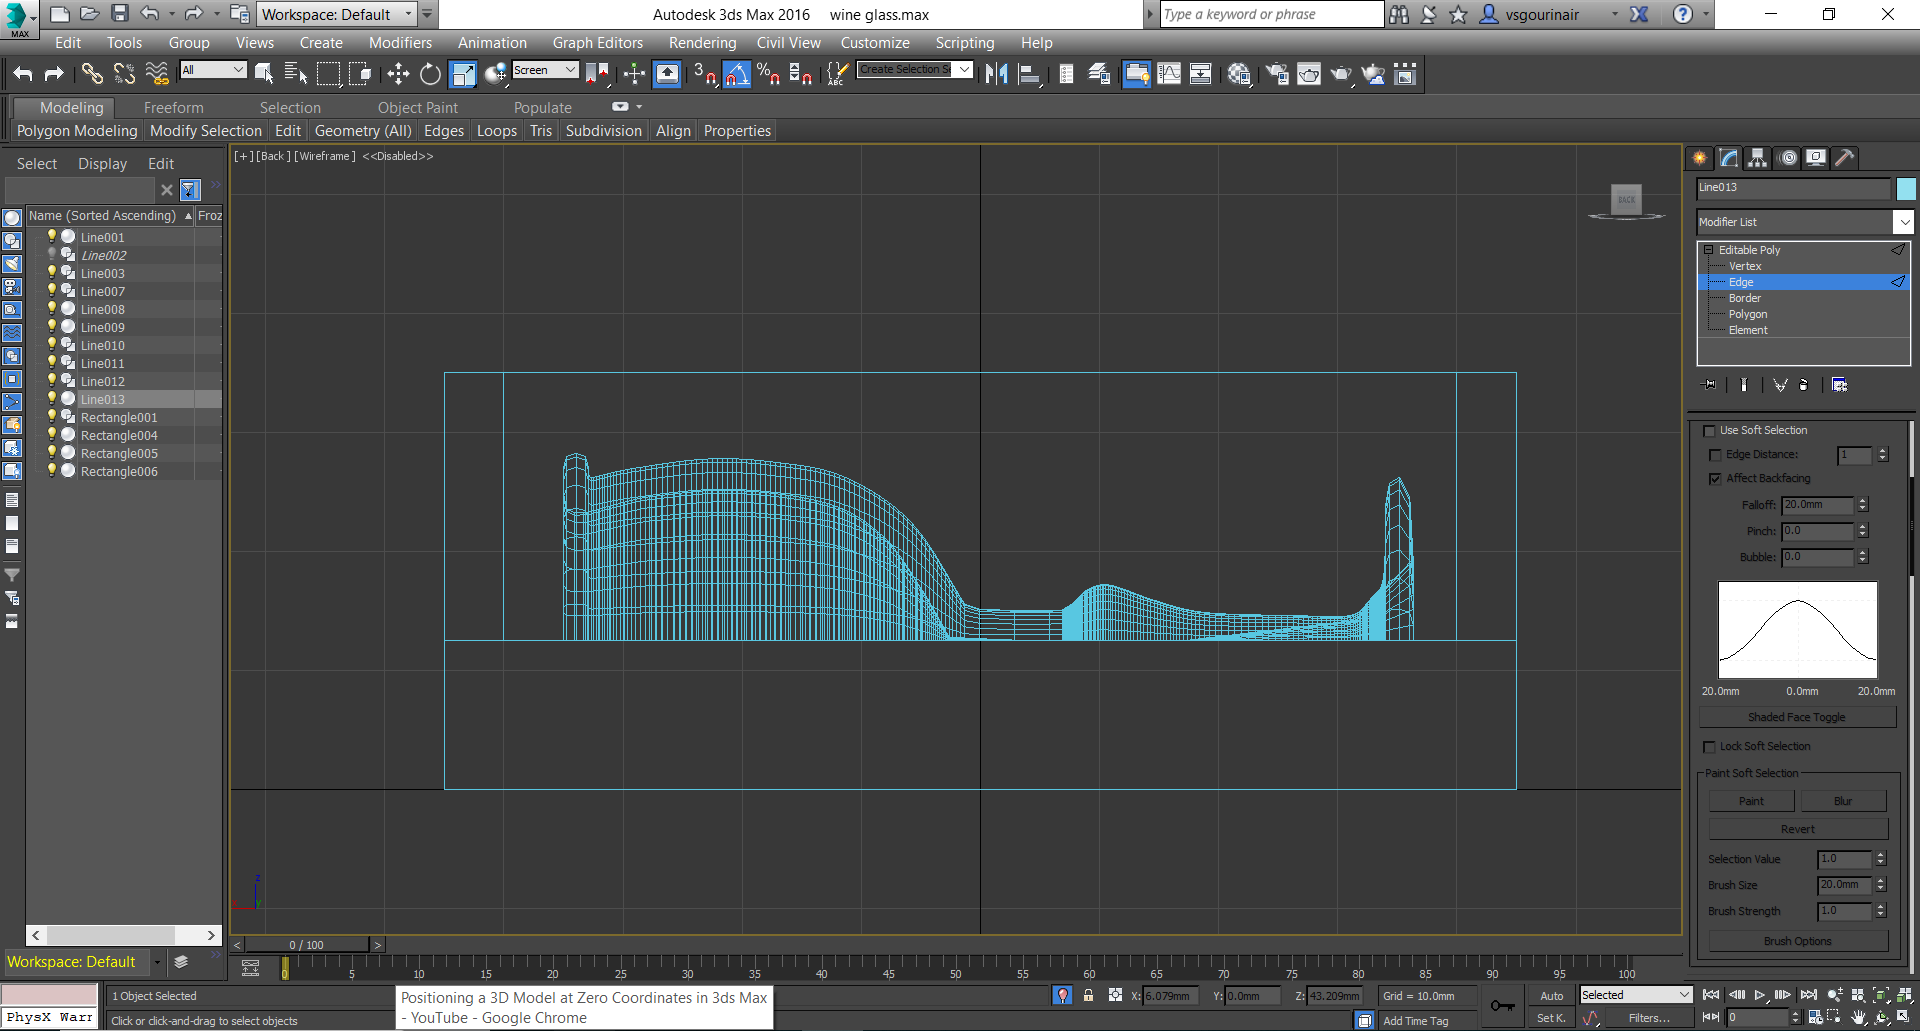
For this week i designed a wine glass in 3ds max.I made a simple one line glass shape using line tool and used modifier LATHE in 3ds max.
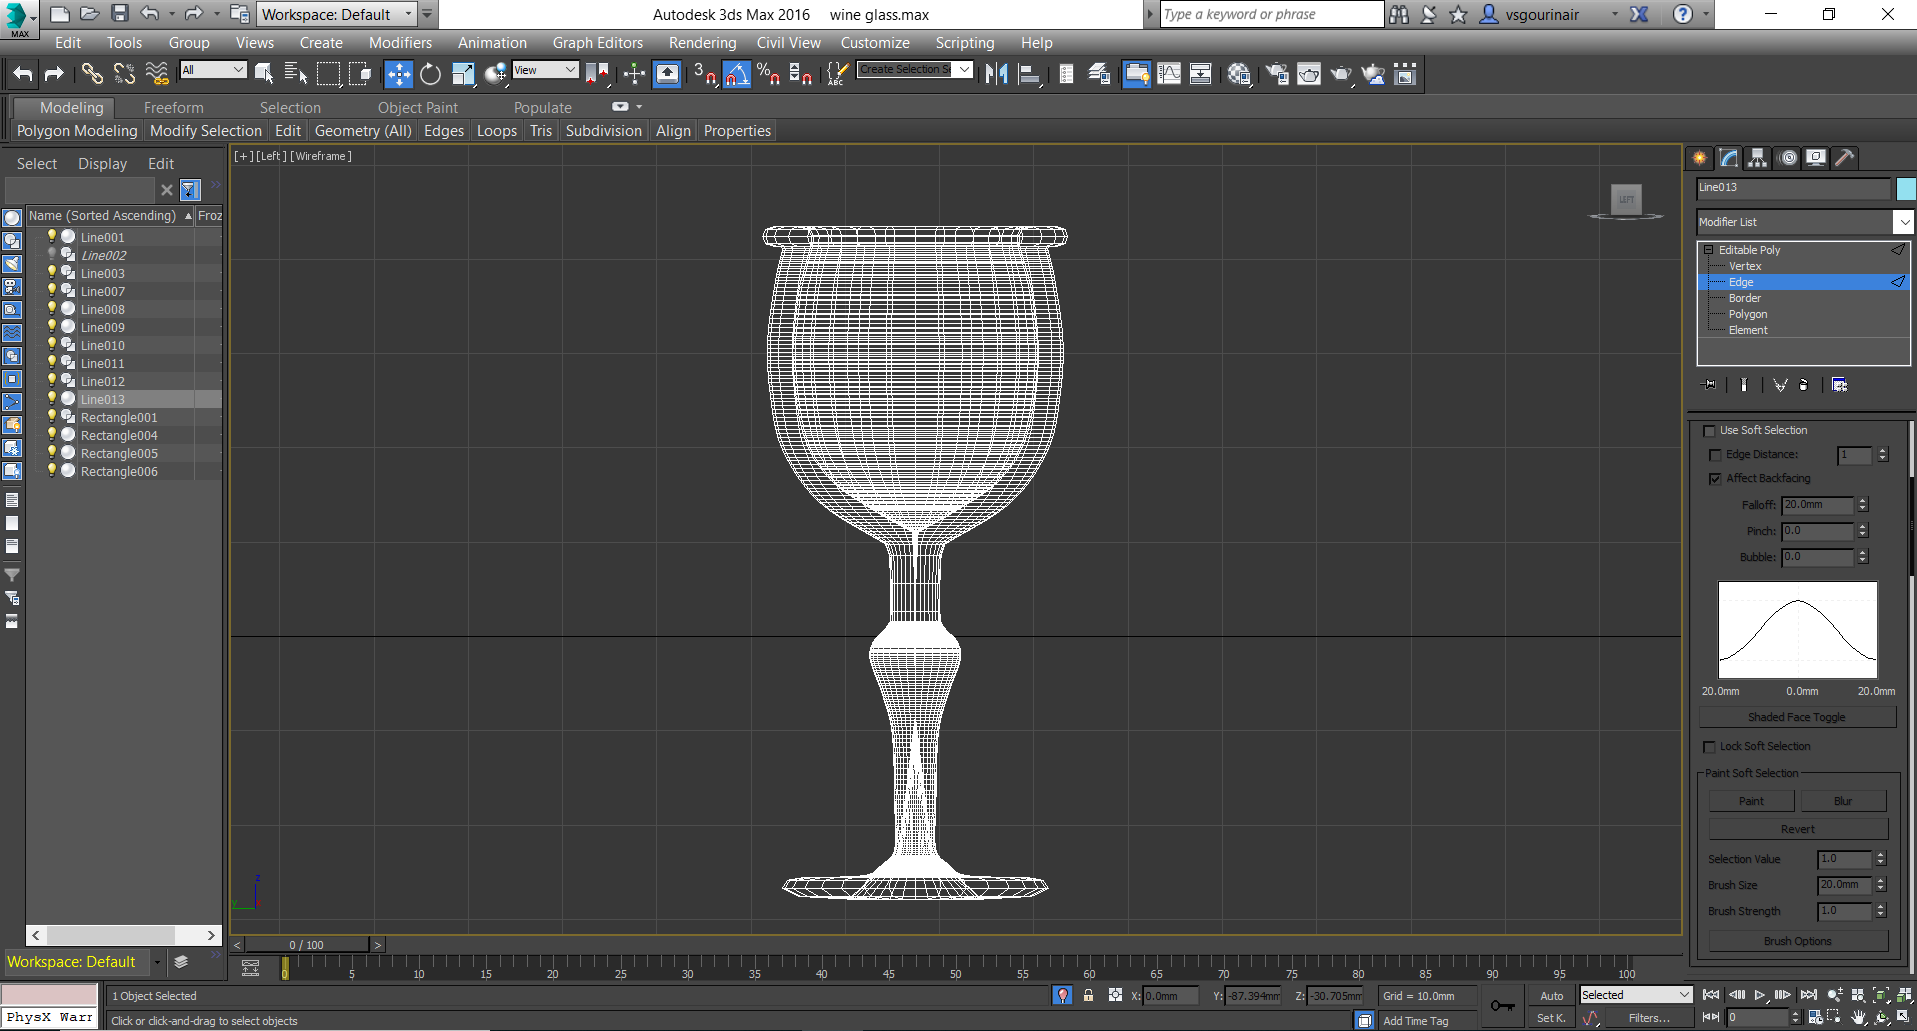
I made it smooth using the modifer turbo smooth from the modifier list.

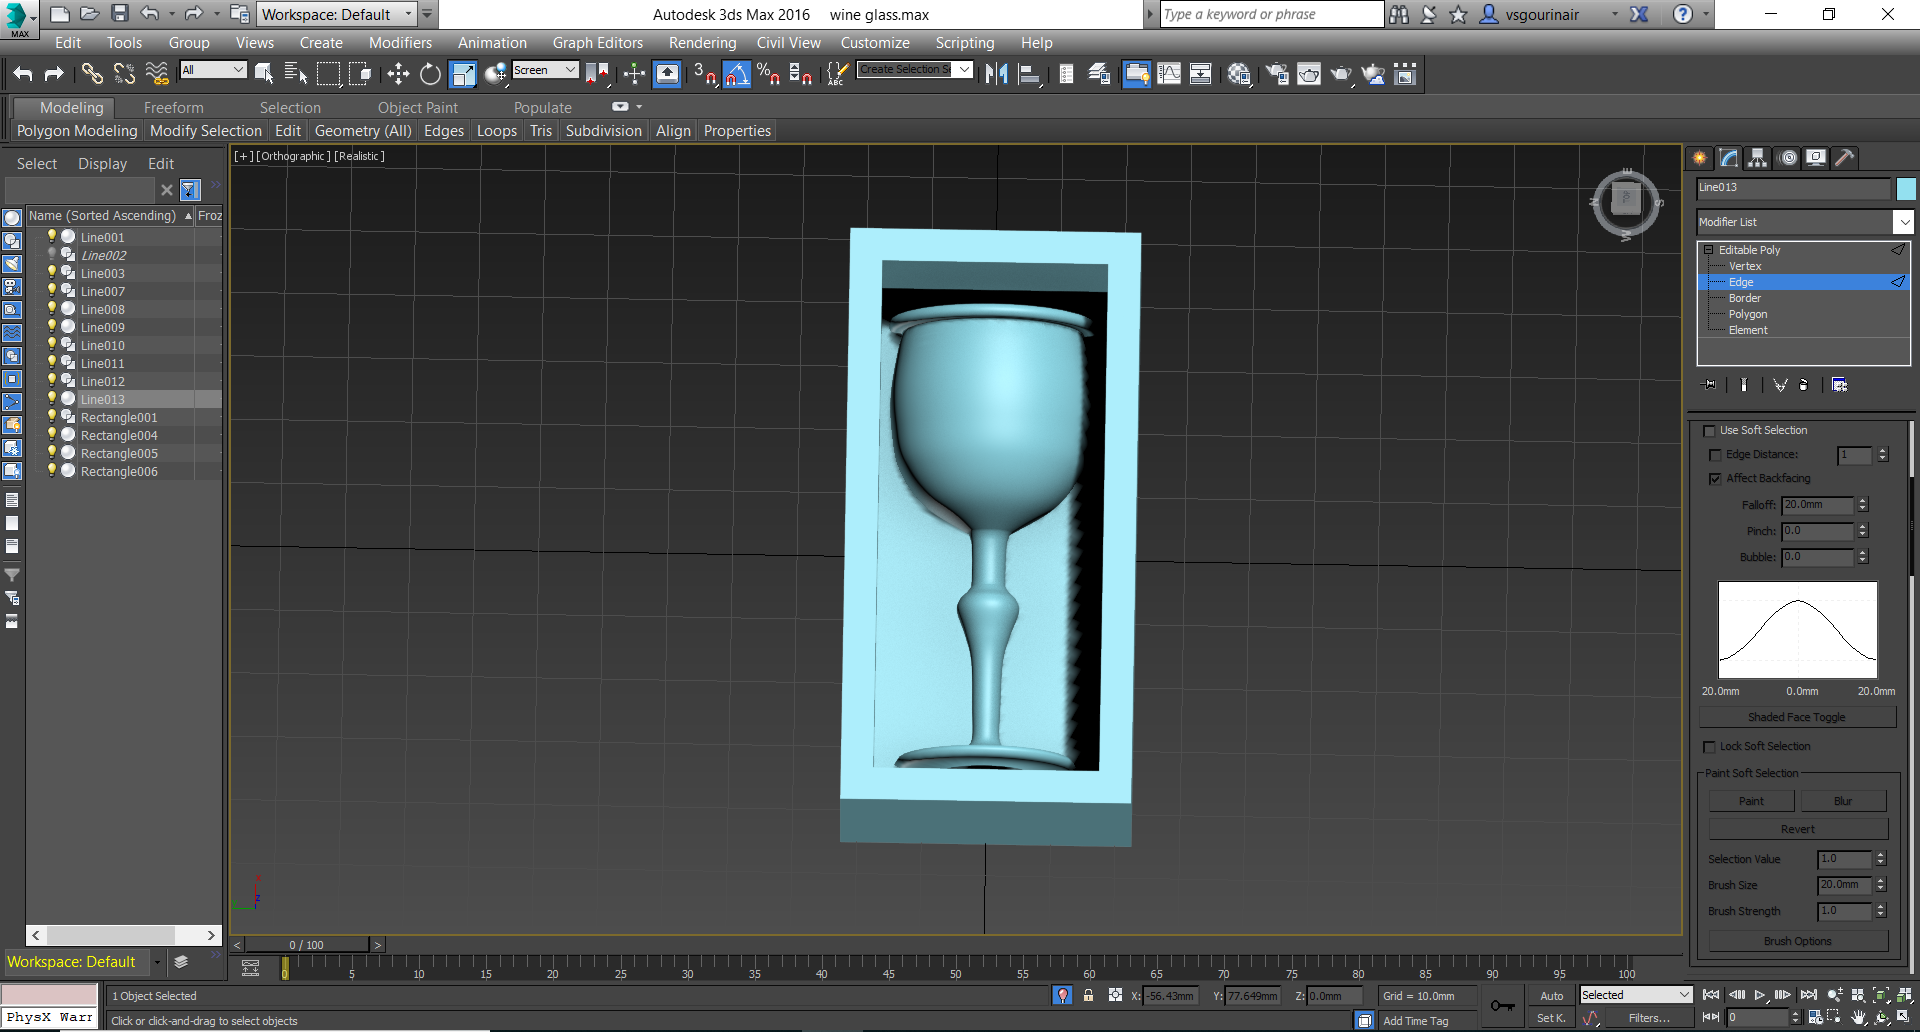
Used slice tool to cut the model equally into two half.Then i made a rectangluar box to mill out my positive.
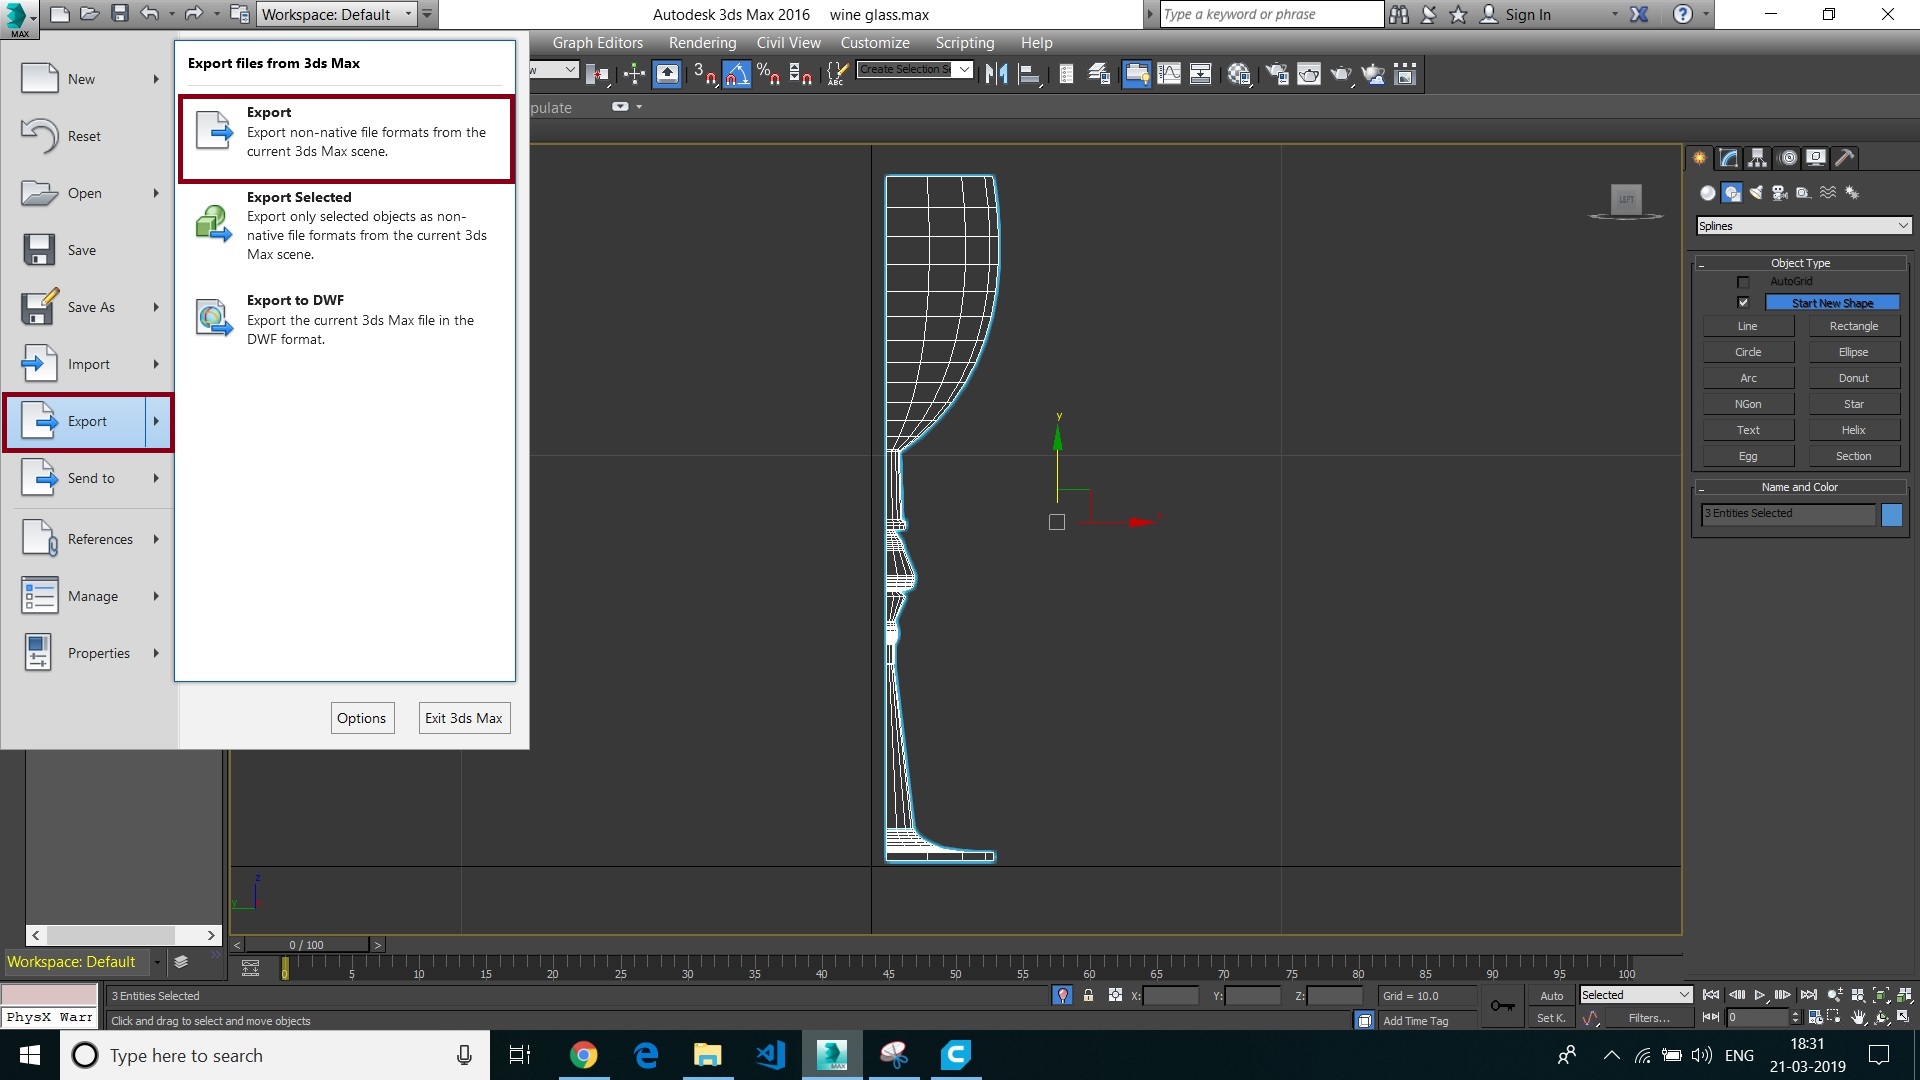
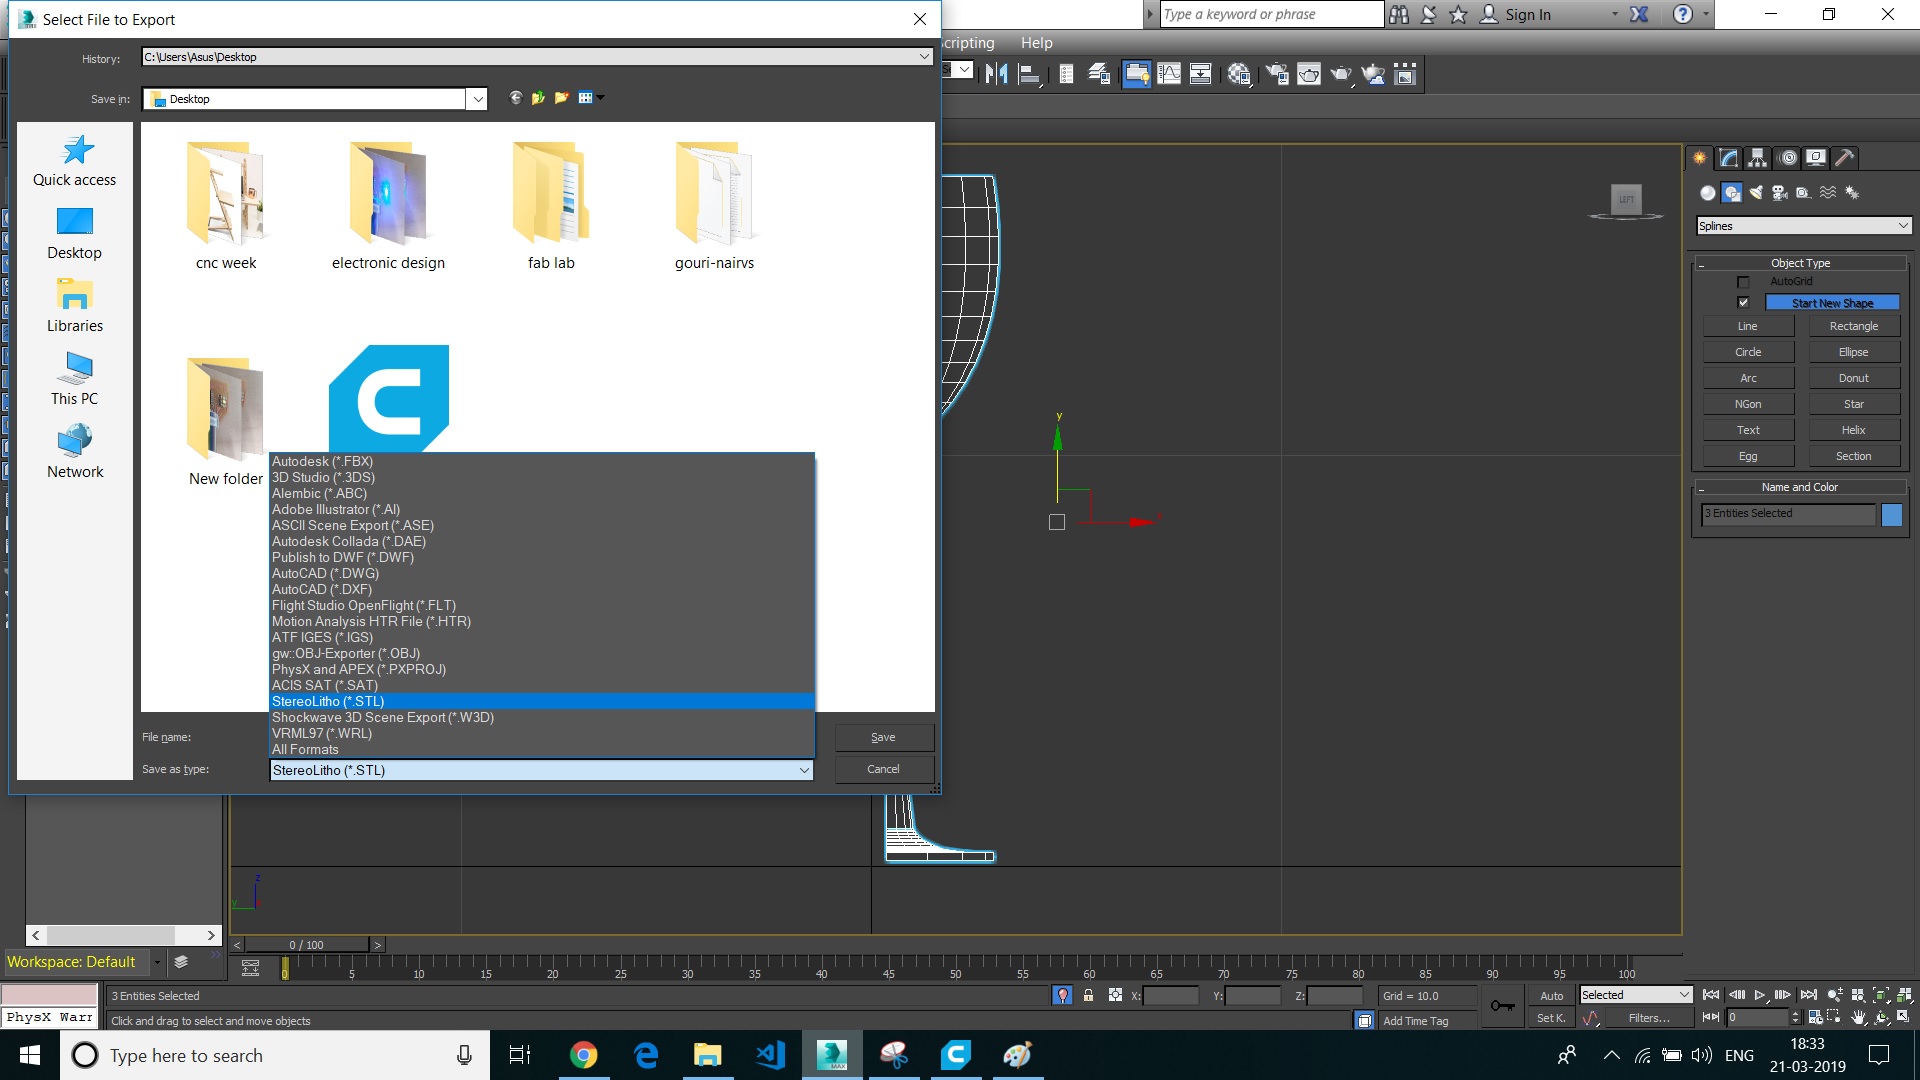
Finally the file was ready to export has .stl.
Save the file in .STL format .
Setting-Up Modella
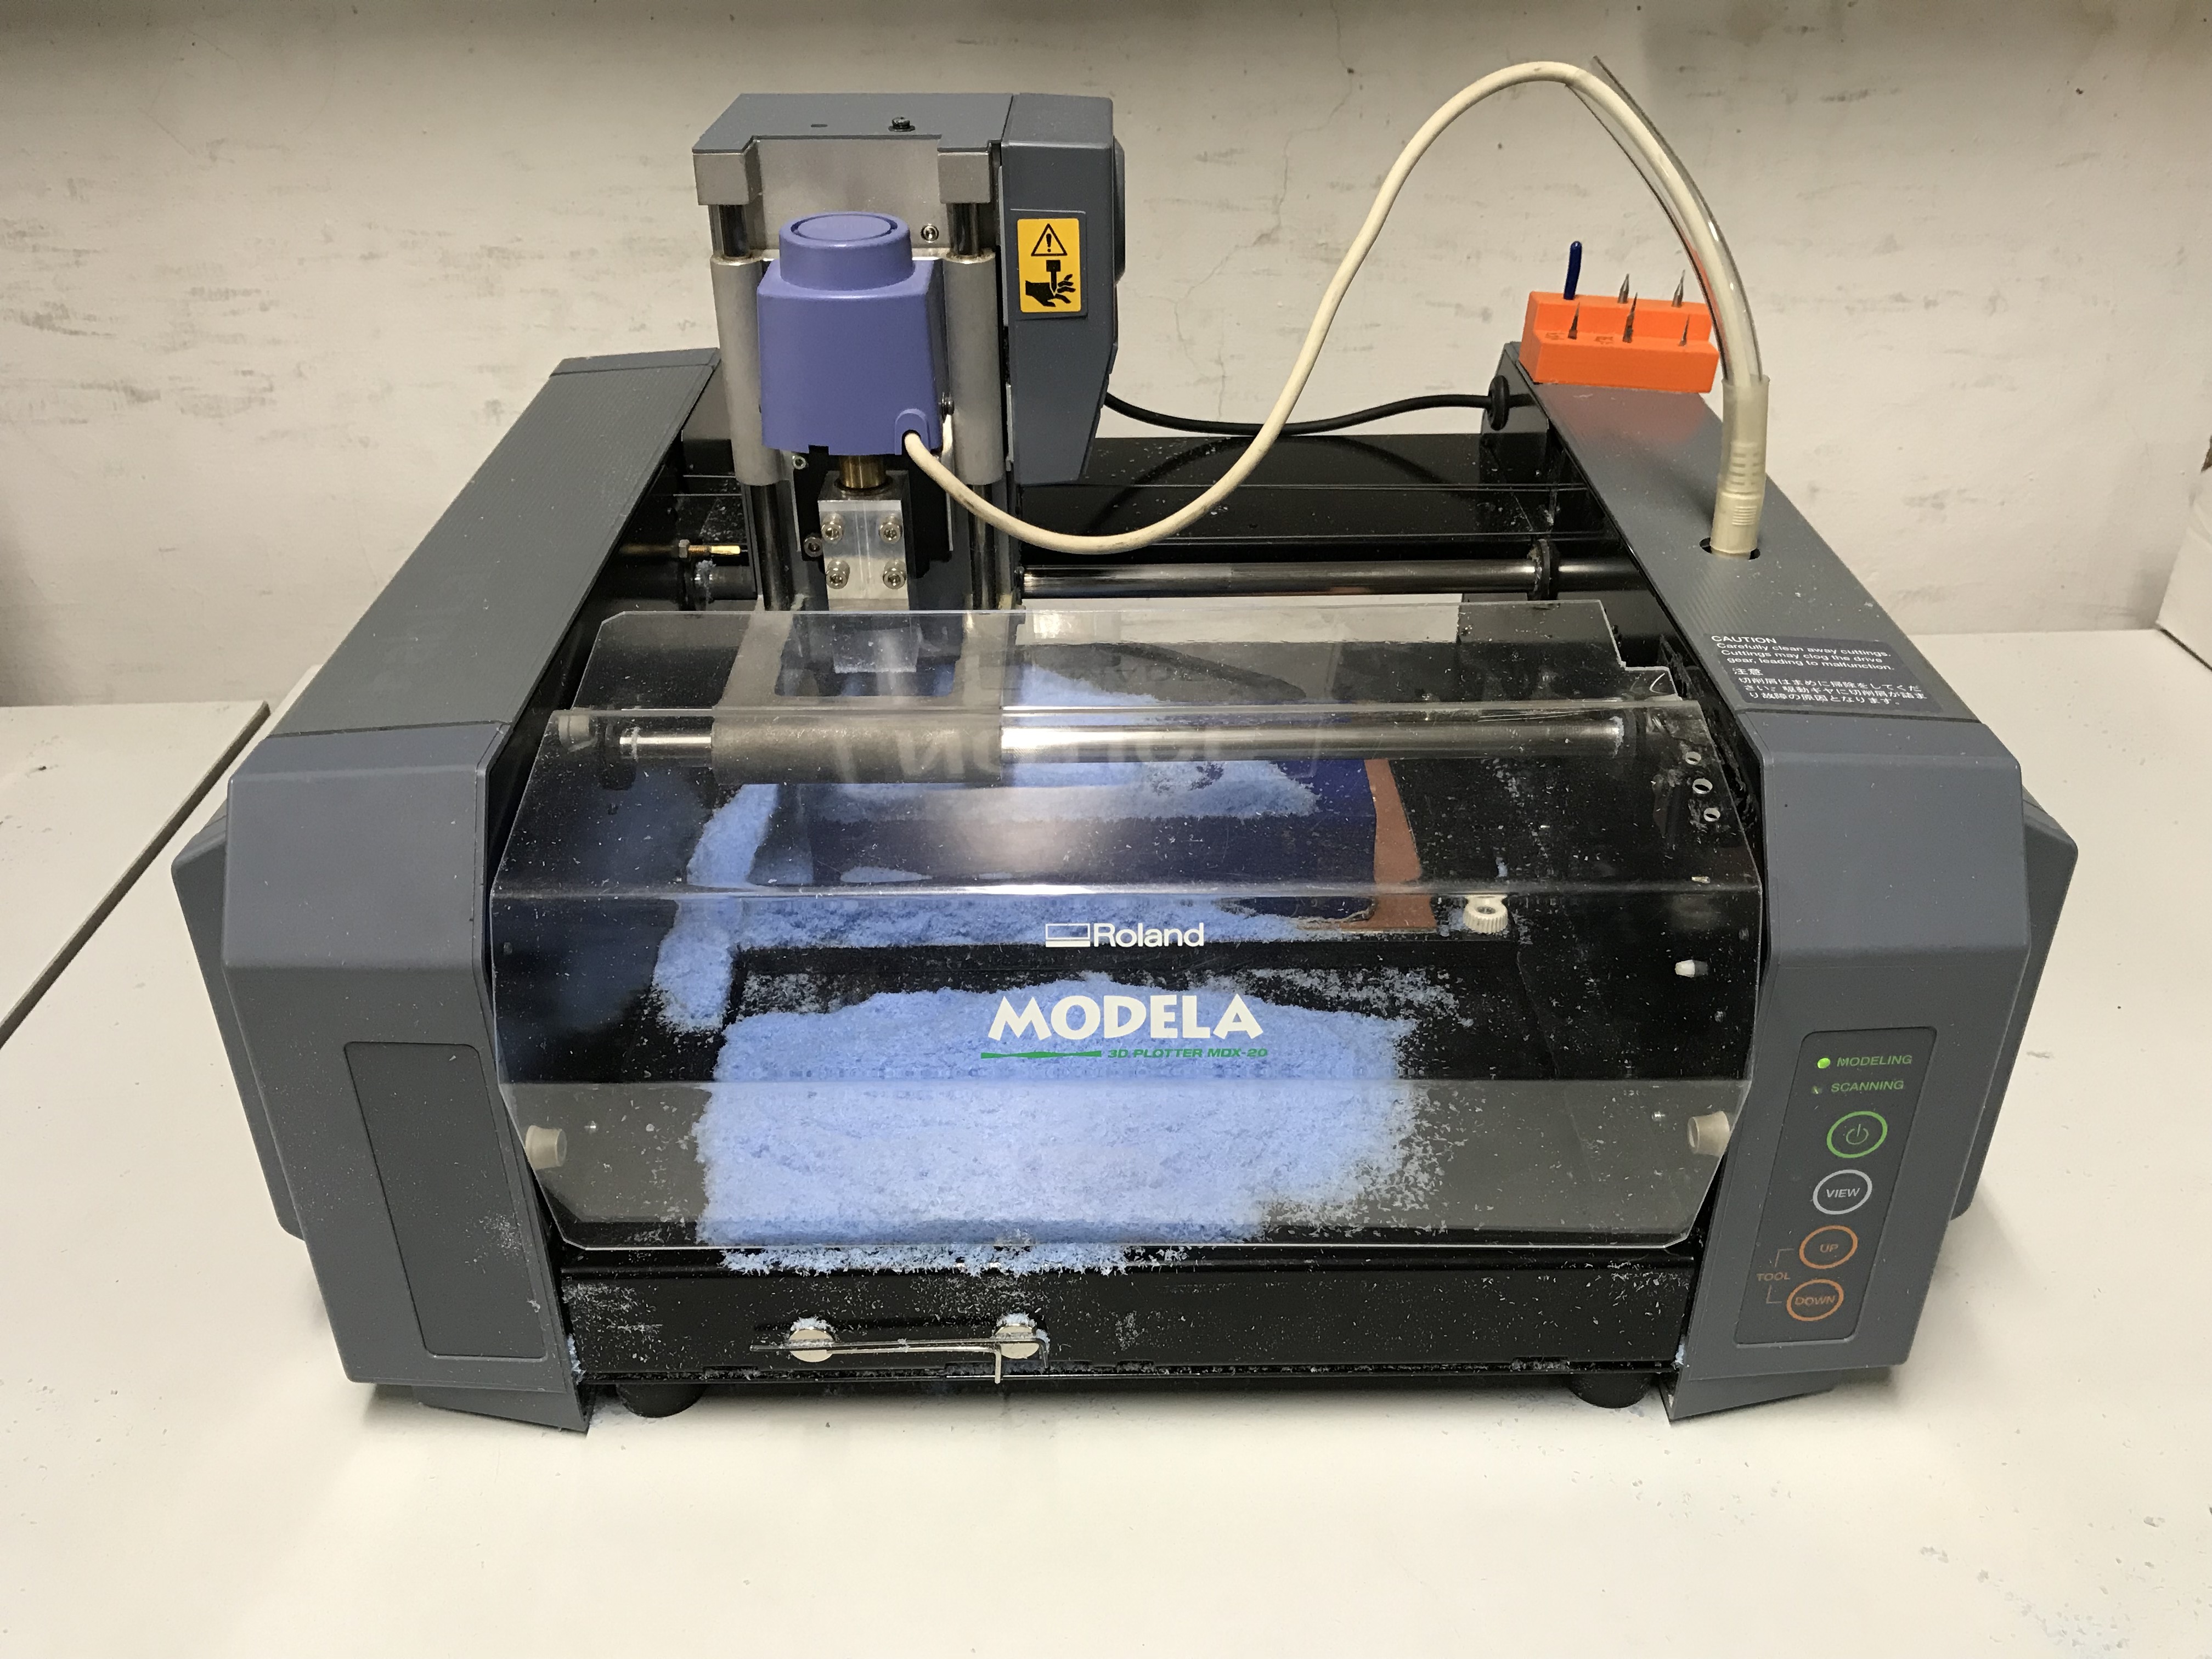
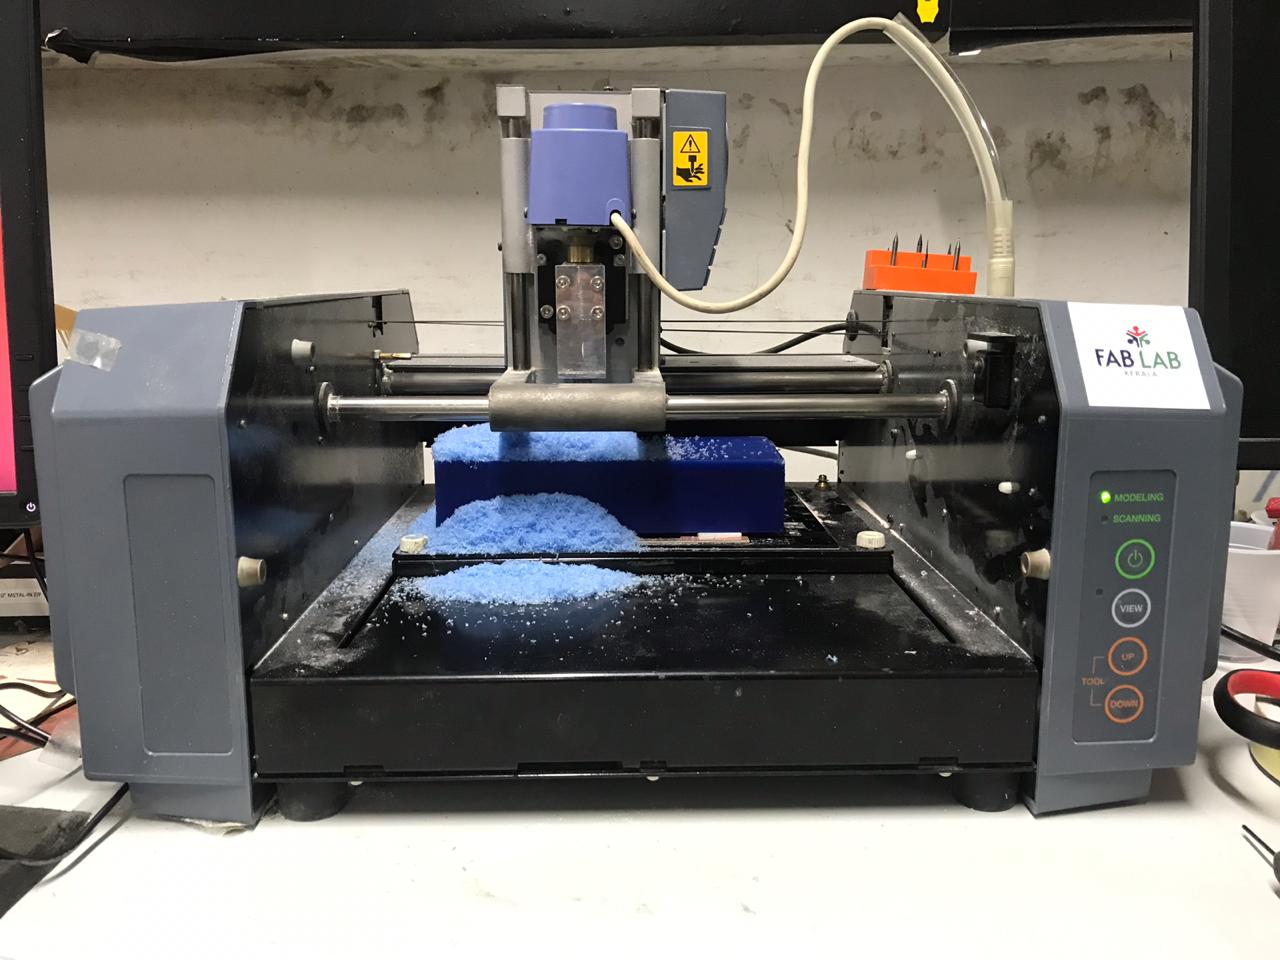
The machine I use is Roland Modela MDX-20A
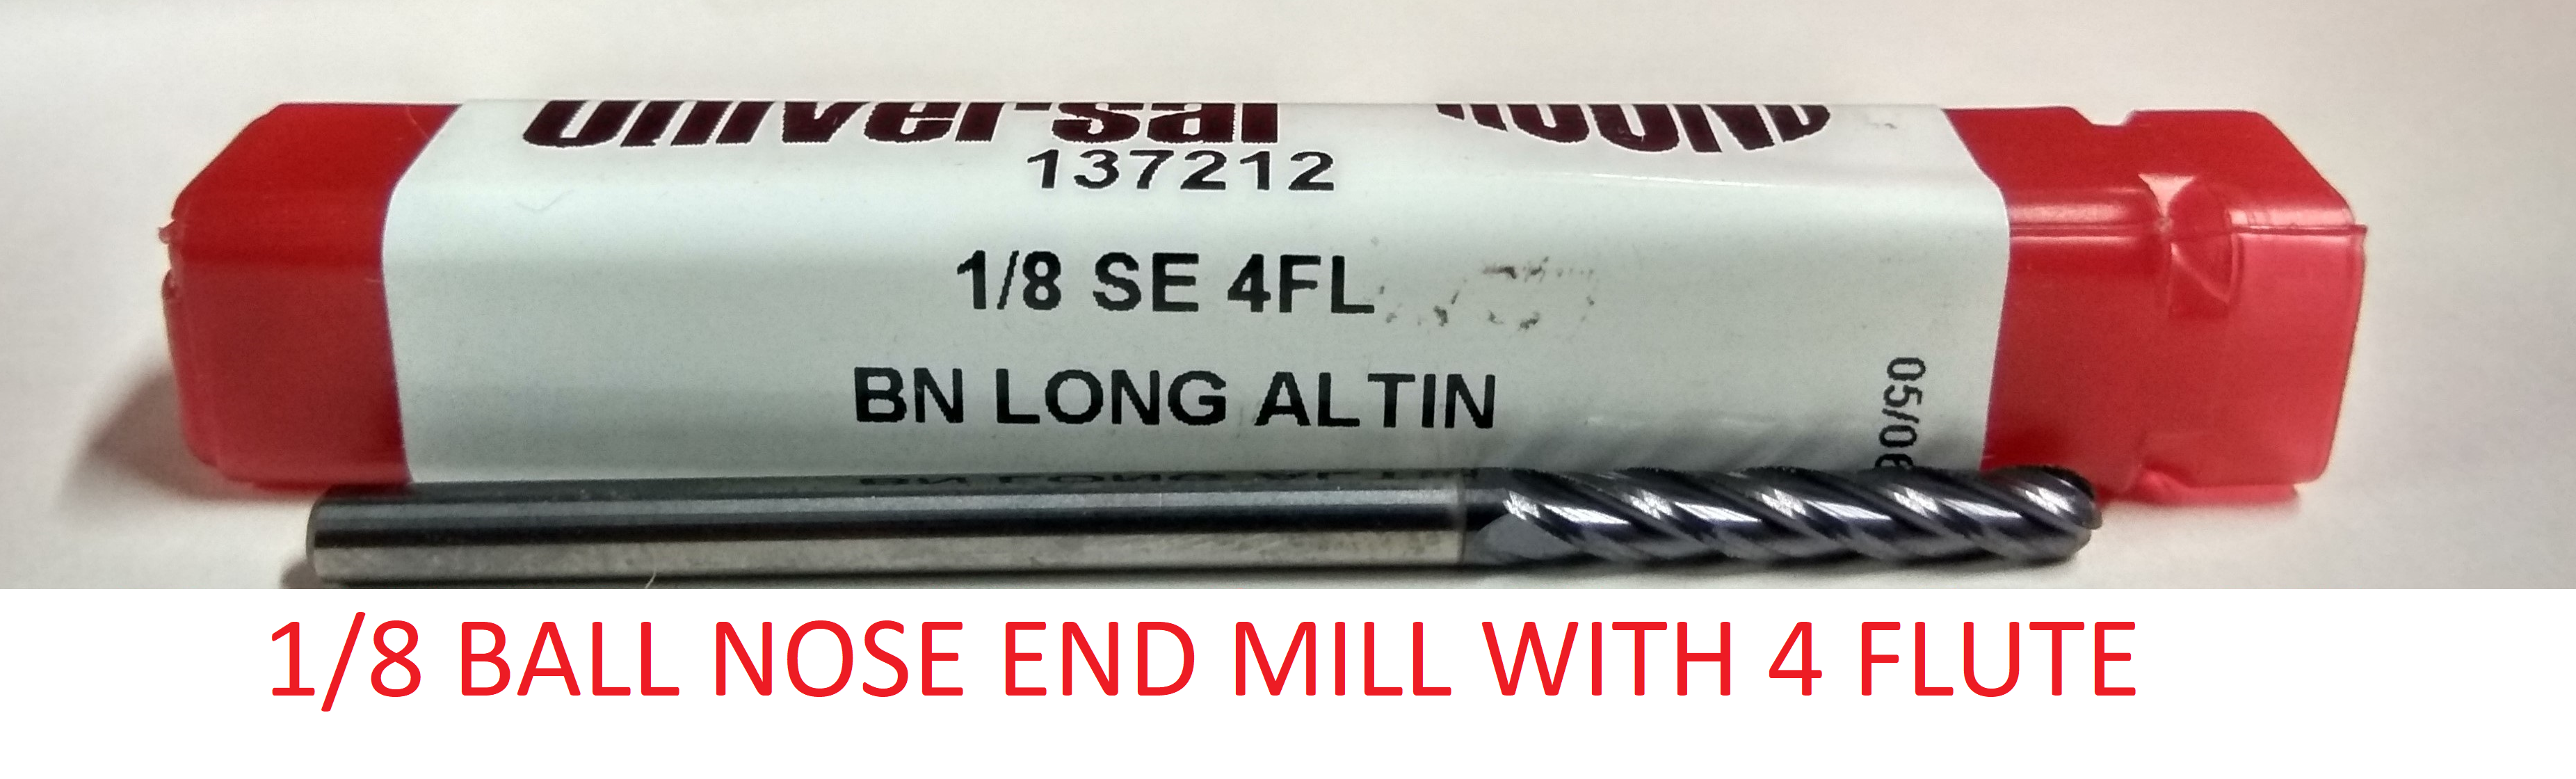
For milling, we are going to use a "1/8 inch" ball end 4 flute bit
Now take a wax block and attach double sided tape to the back of the wax block
Now the model is ready to be cut, so you have to set your piece.
Process
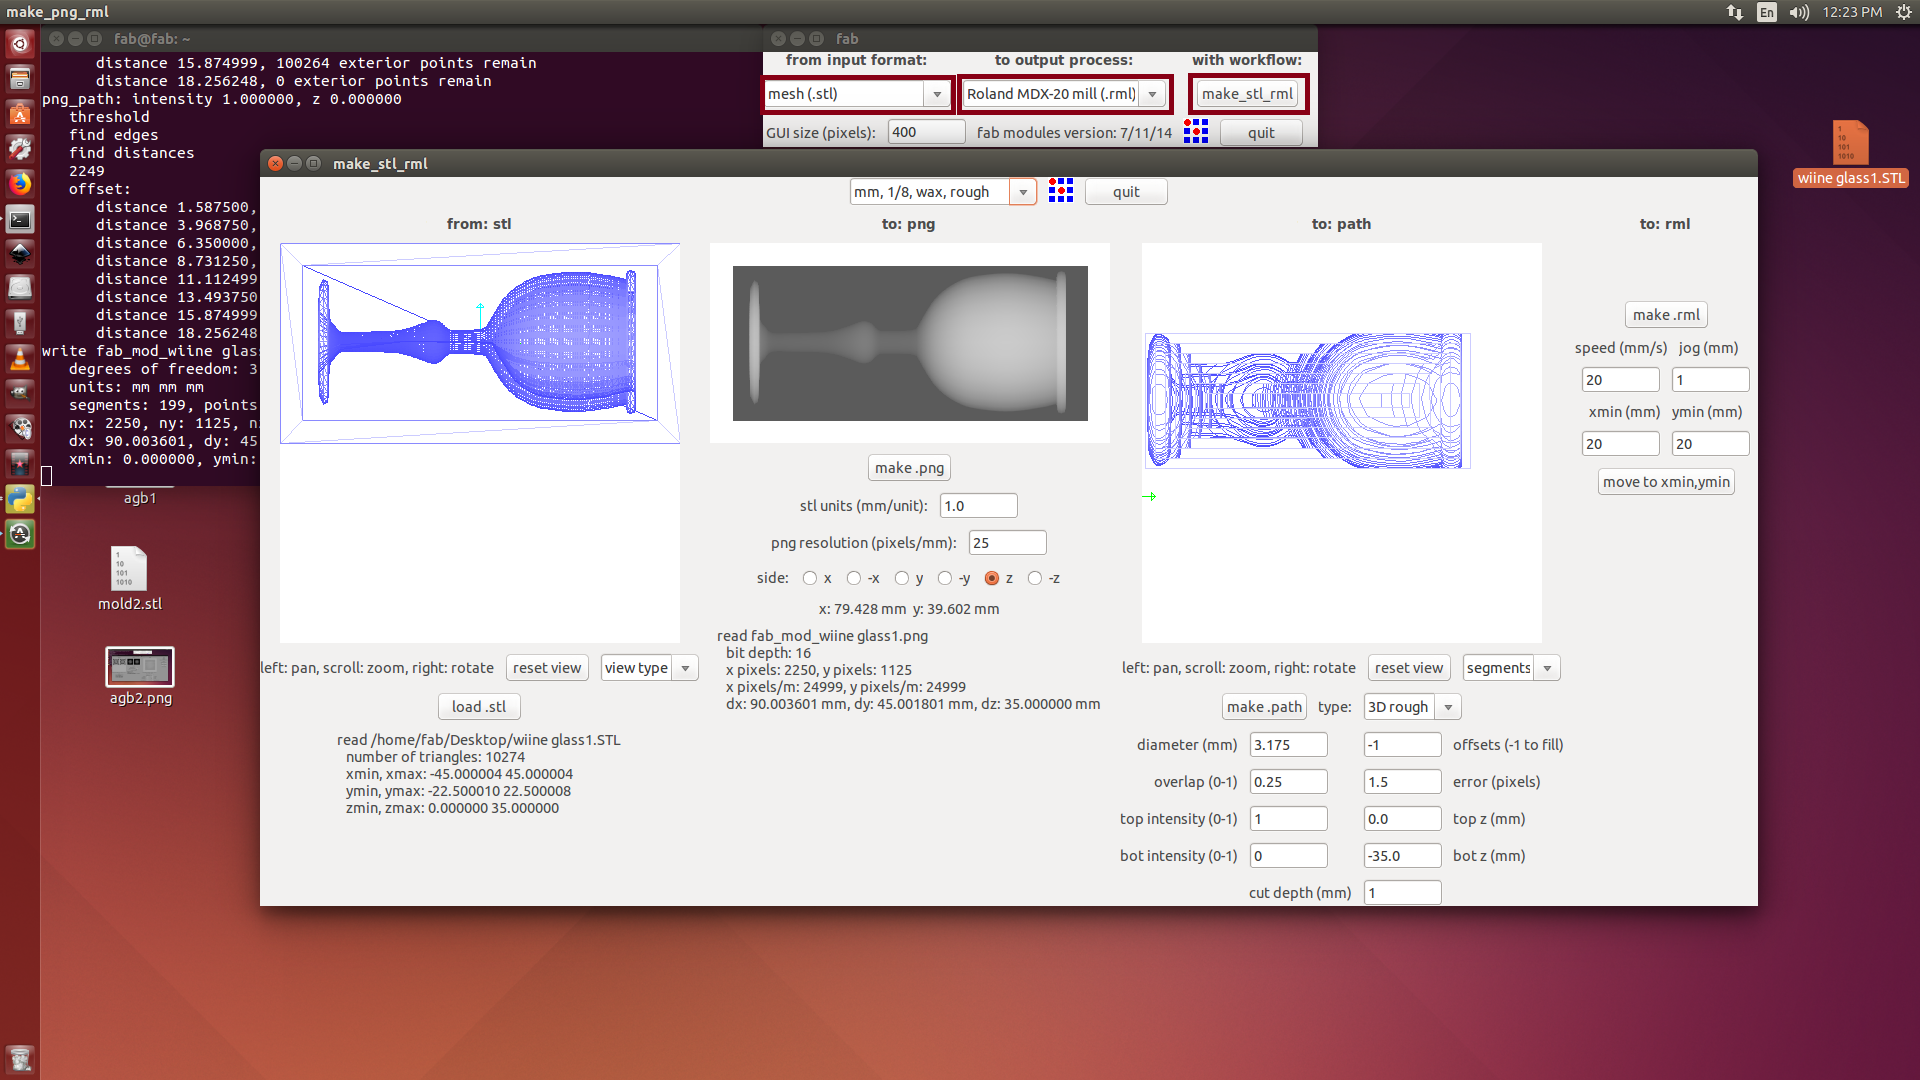
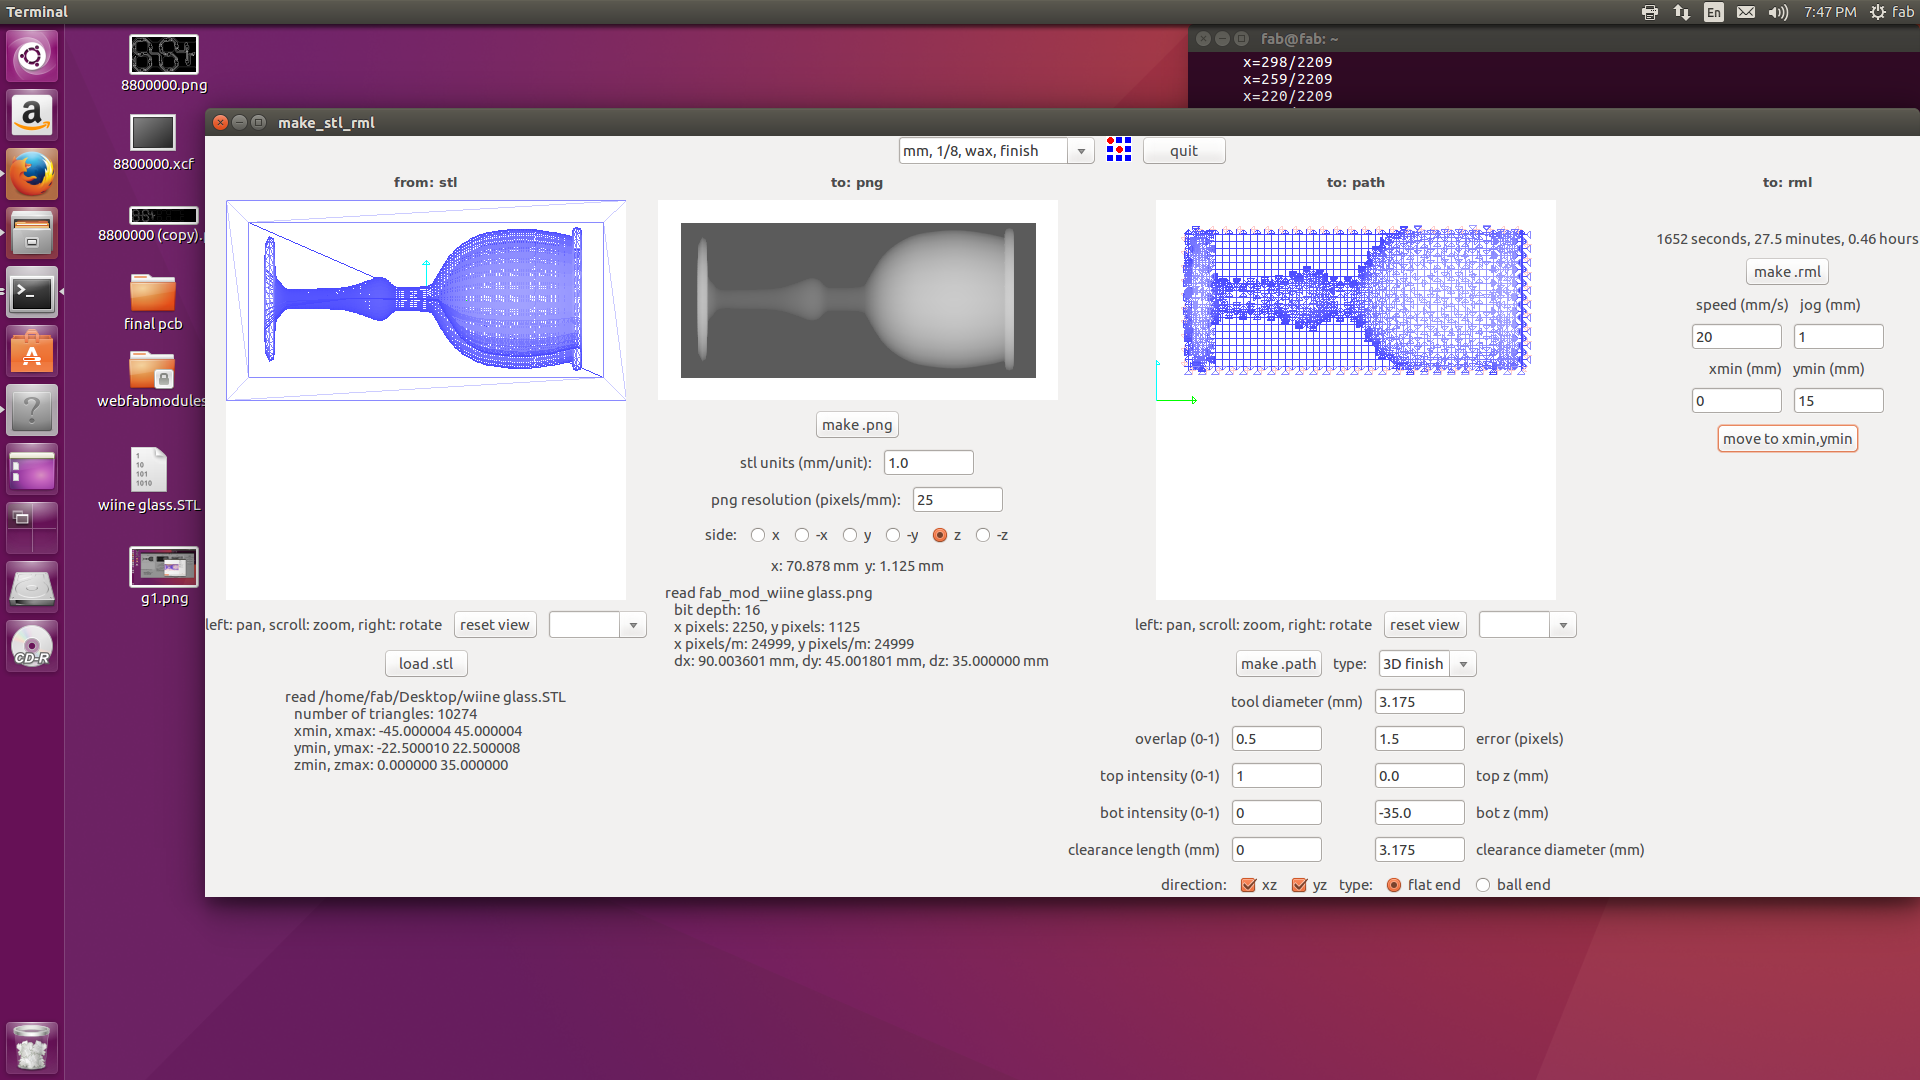
1. Select file format (mesh .stl)
2. Select machine as "Roland MDX-20 Mill"
3. click "make rml"
4. Now we have to upload the .stl
5. Select "load stl" and select the required file
6. Select process as "mm, 1/8, wax, rough"
7. Select "make png"
8. Select "make path"
9. Select "make rml"
10. Select "send it"
There is two part in Milling a WAX ,First Rough Cut then Finish Cut, and we need to change parameter for different settings in fab module.
First we should do the rough cut.
Then the Final step is "Startcutting".
Now we can see the machine has started milling
After the rough cut.now we have to change the settings into finish cut.
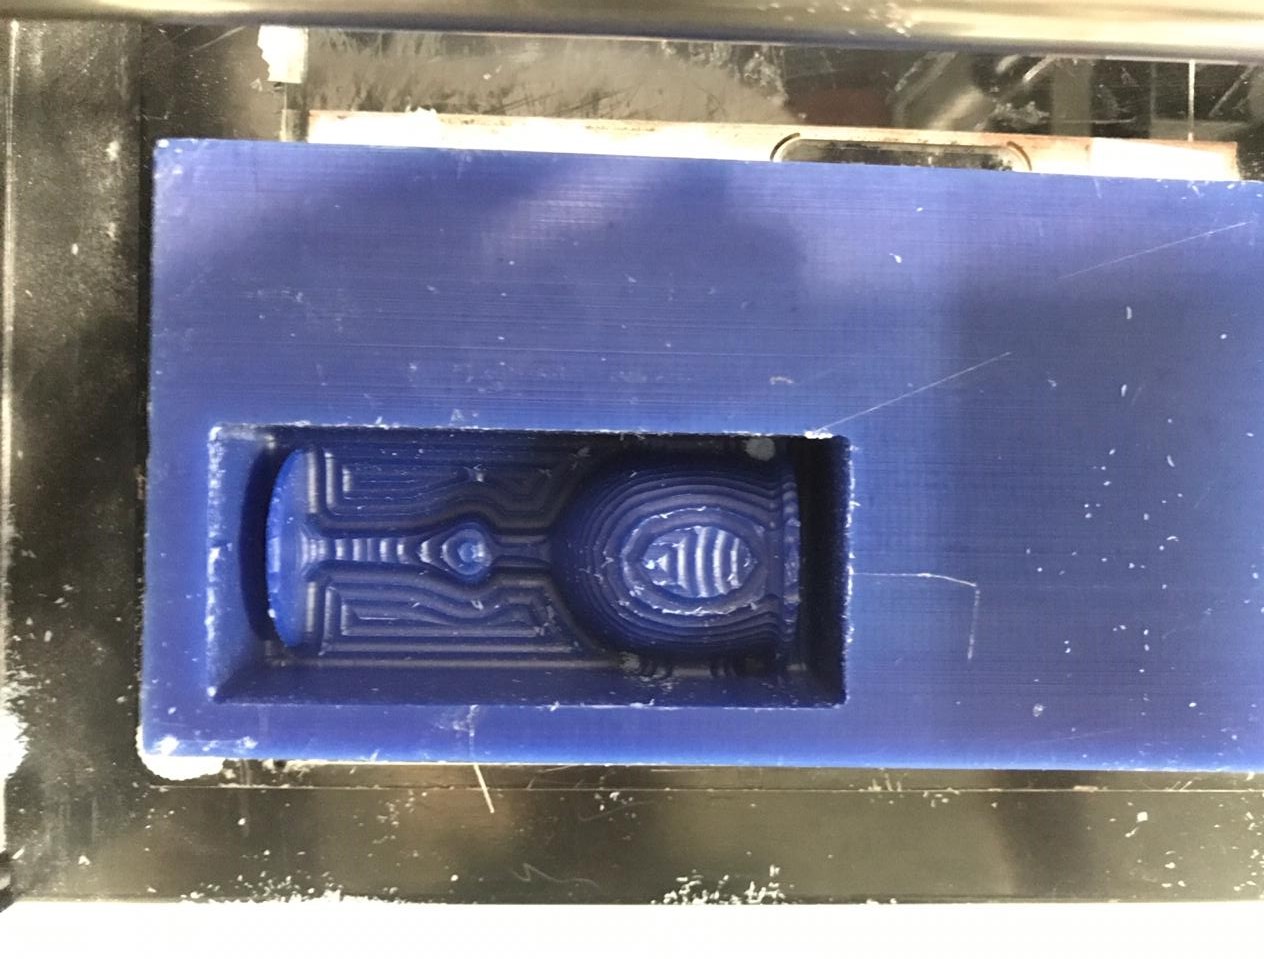
Wine glass design milled out in wax block.Now the positive is ready for next process.
The difference between the rough and finish cut.
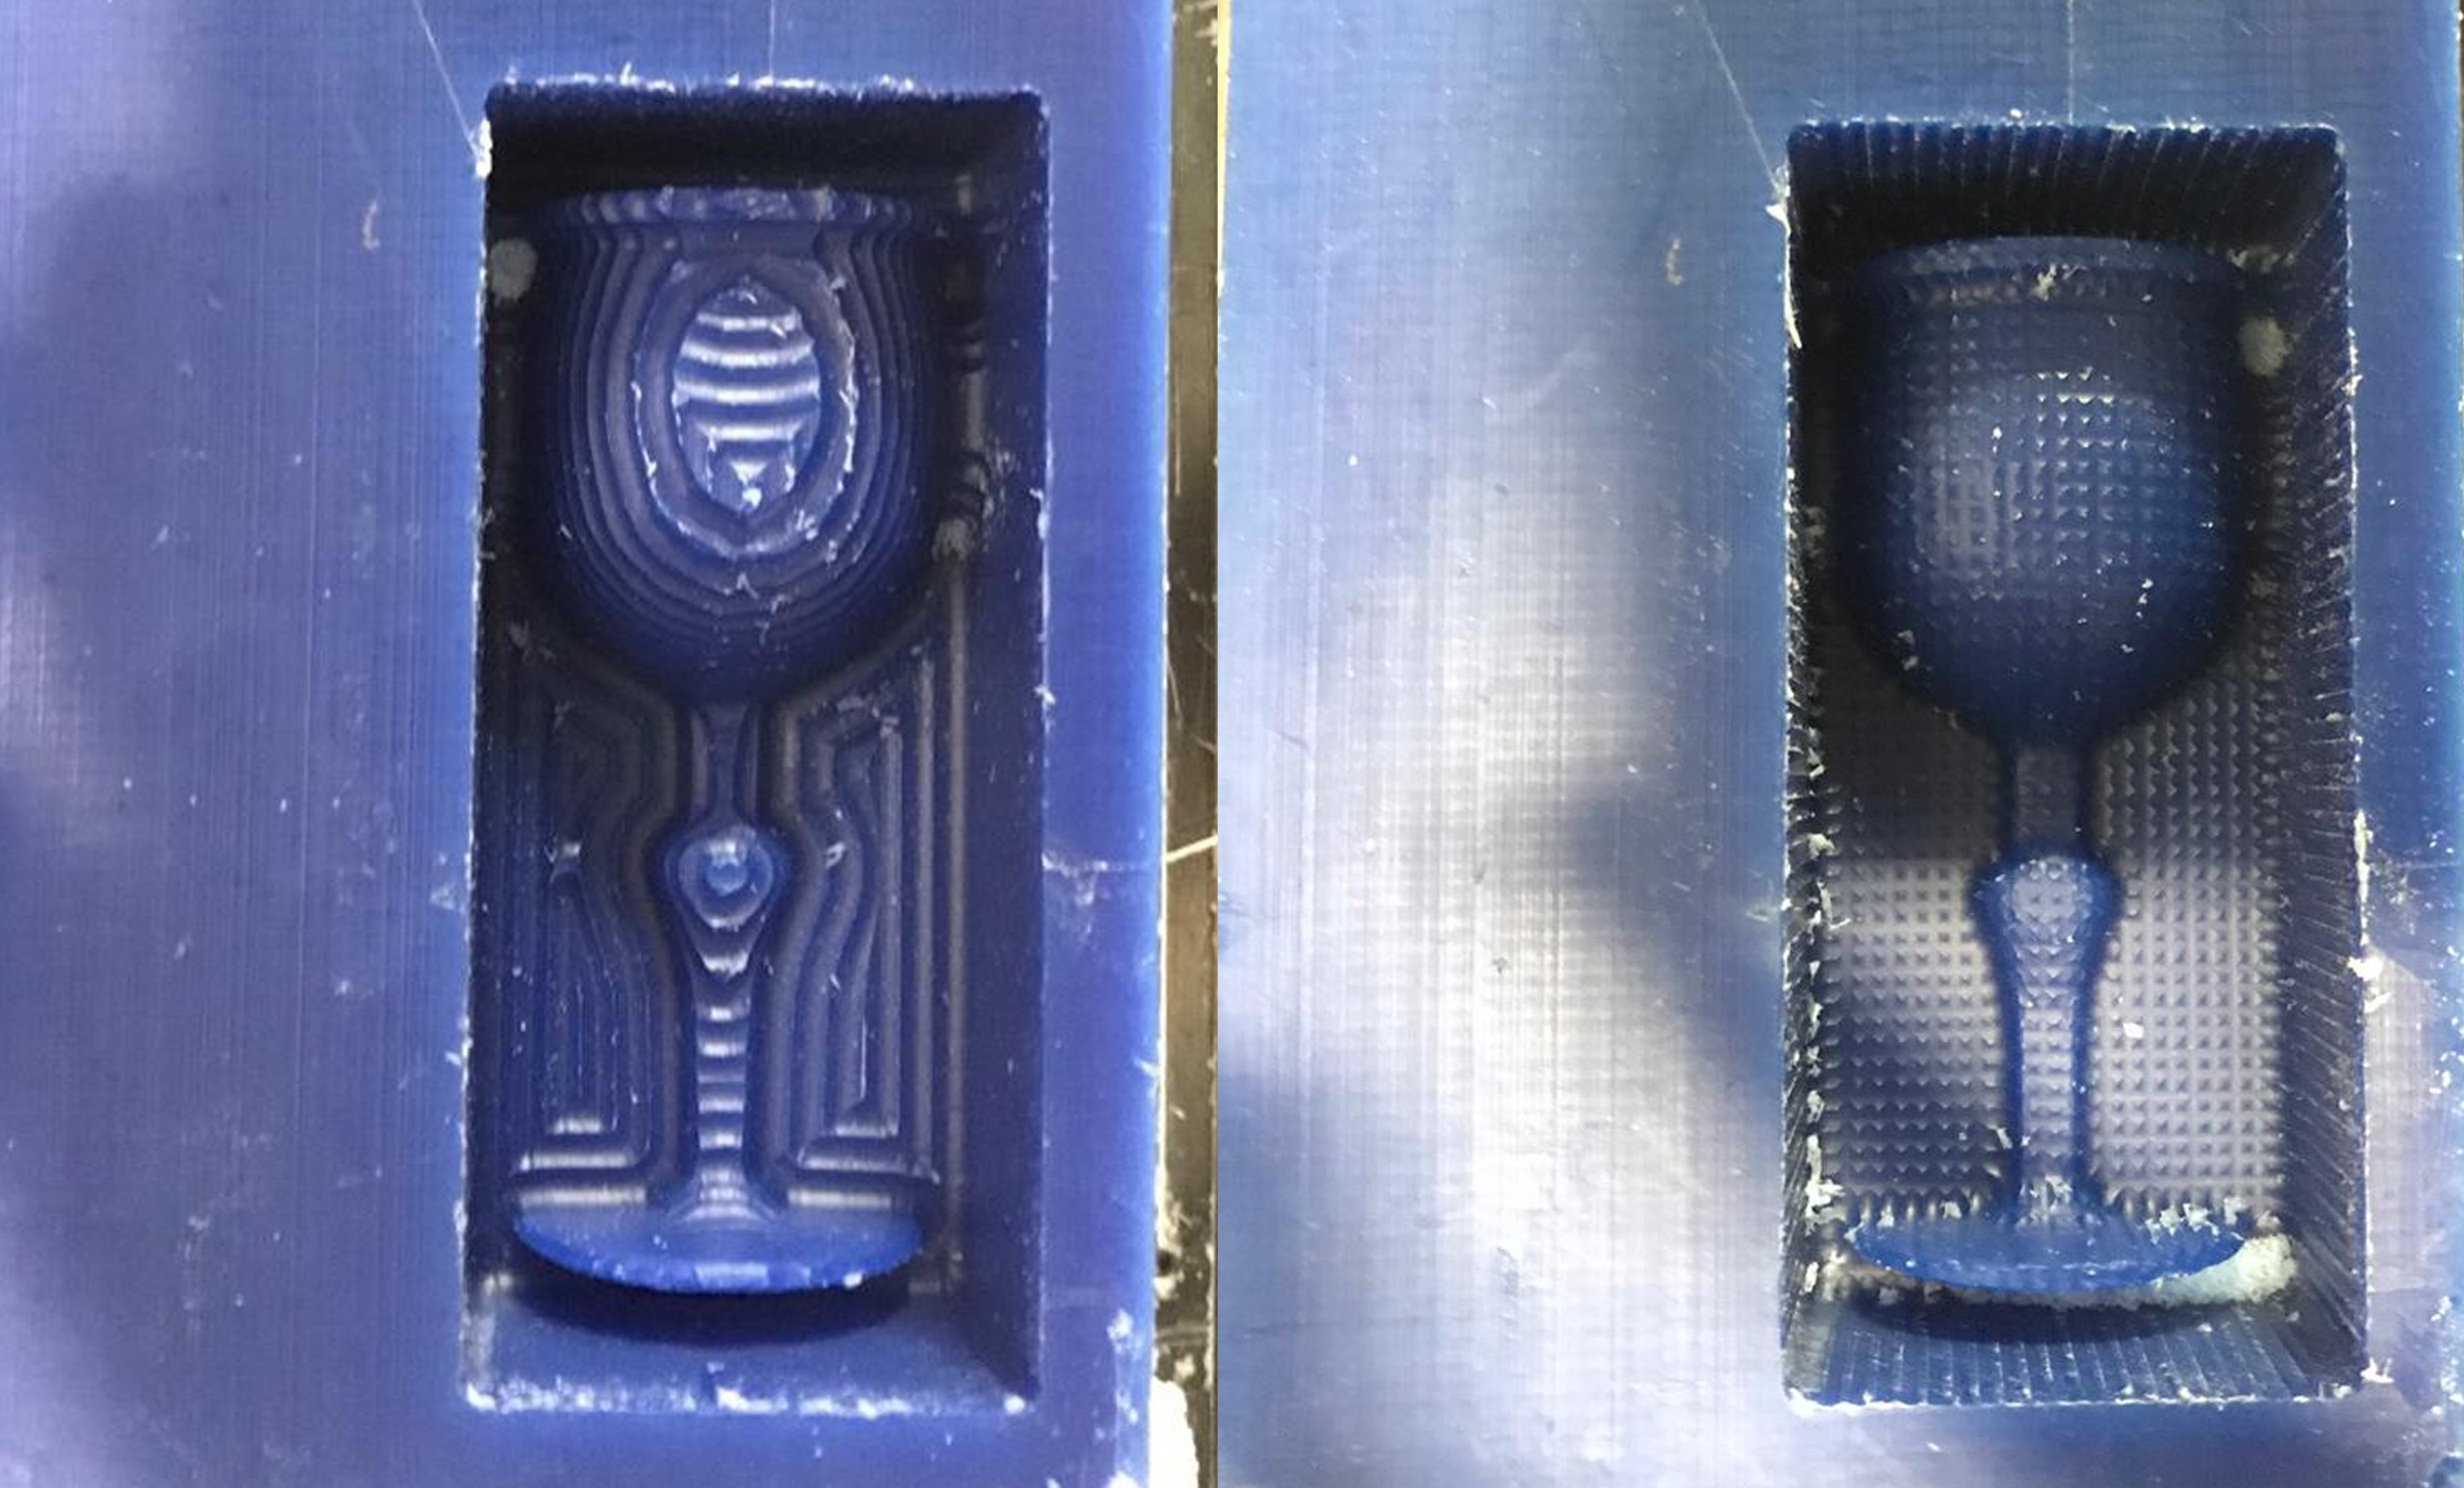
This is the max finish which is achived from finish cut since we used the same 1/8 ball nose.
Finally after the two portion milling.
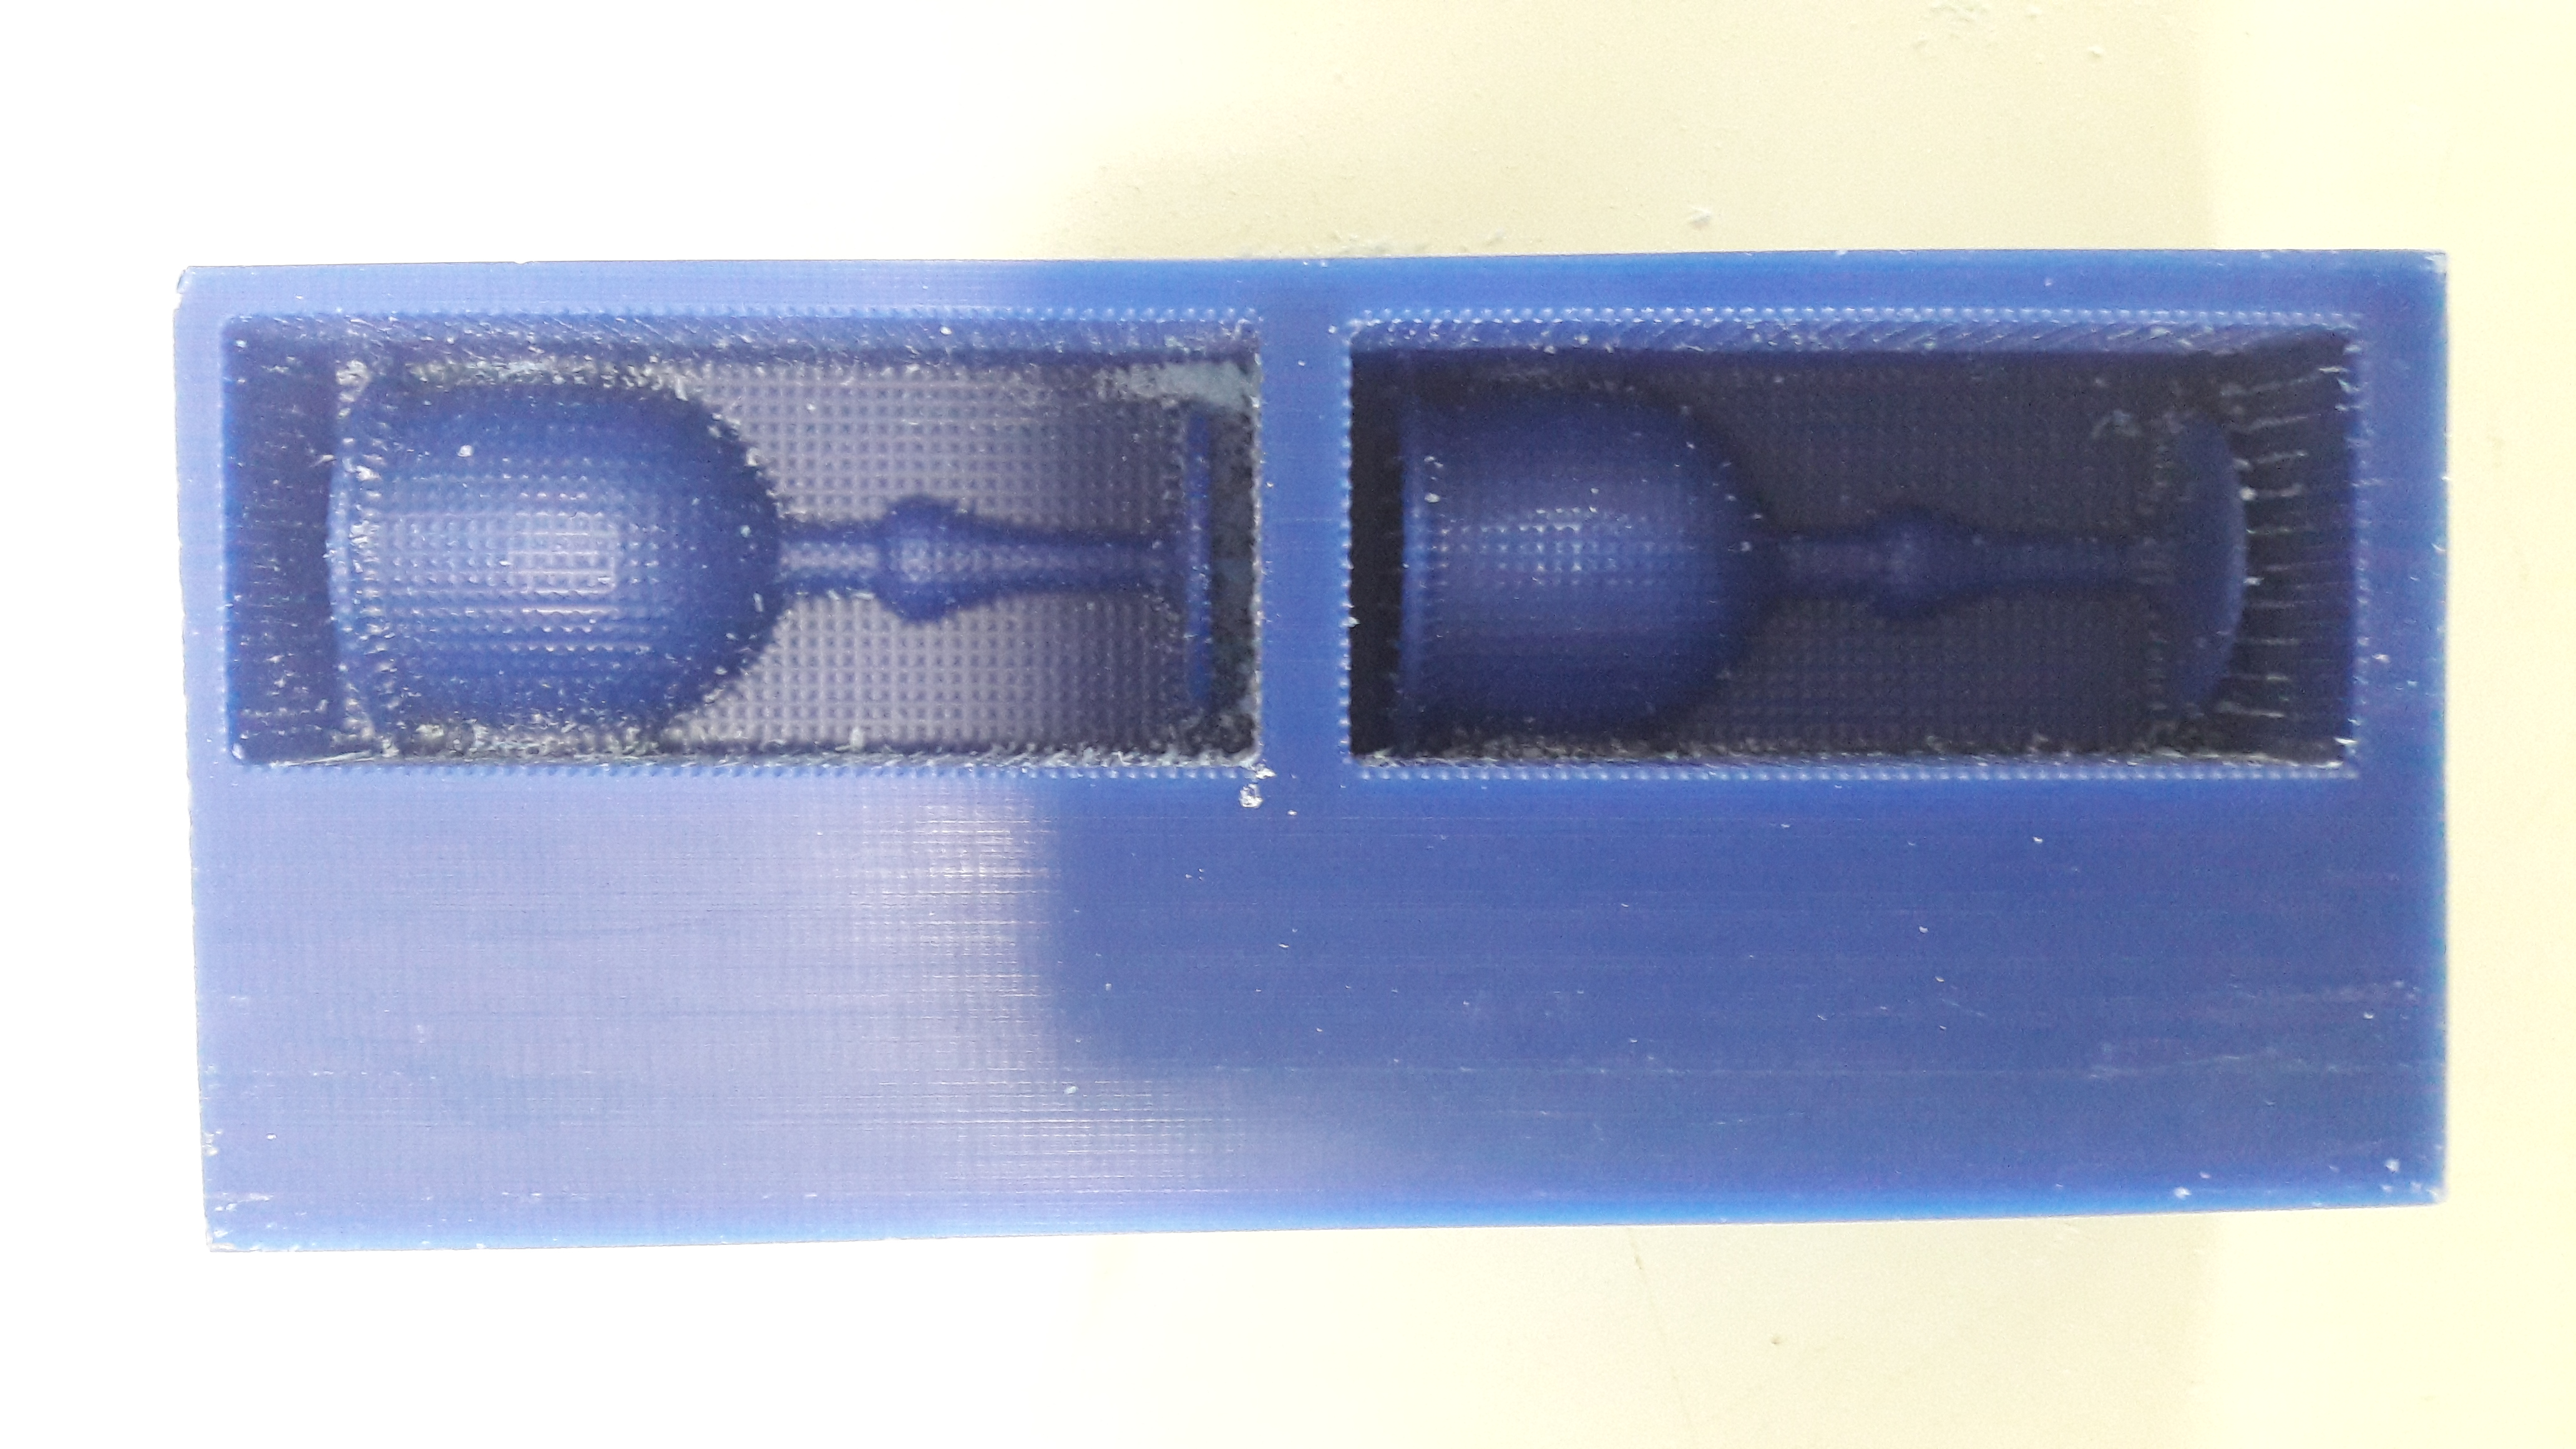
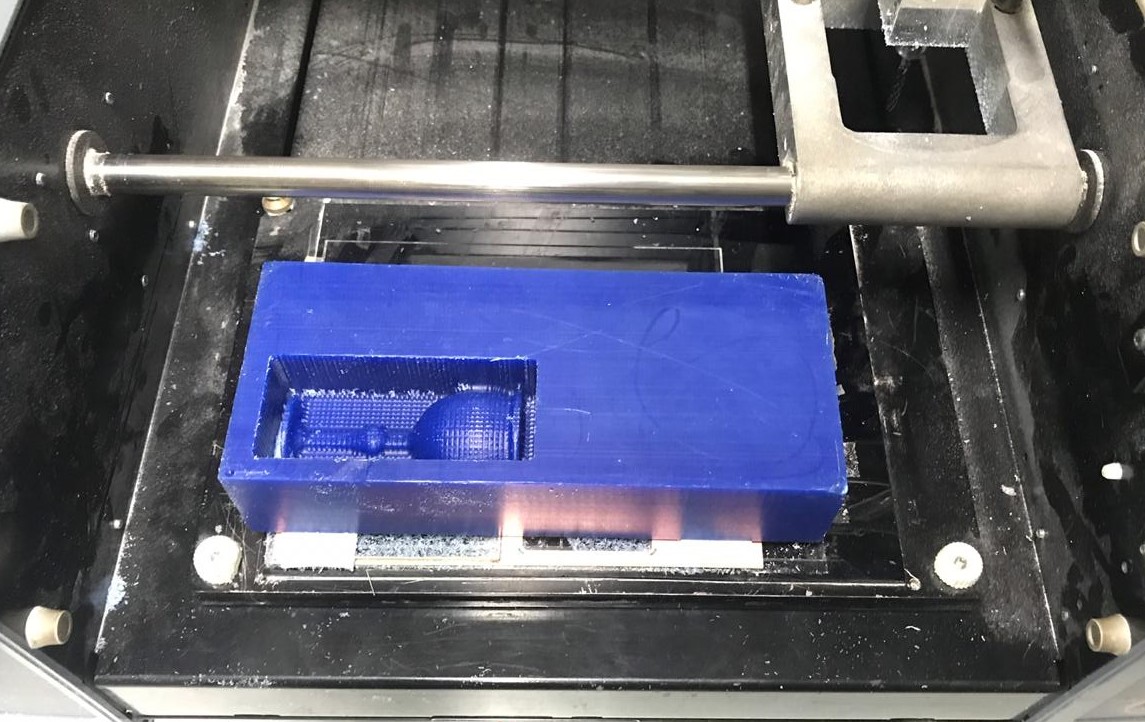
NEAGATIVE MOLD
So now we got the Postive Mold , next we need to make Neagtive Mold using the Positive Mold.
i choosed SMOOTH-ON Liquid Rubber for making the mold.
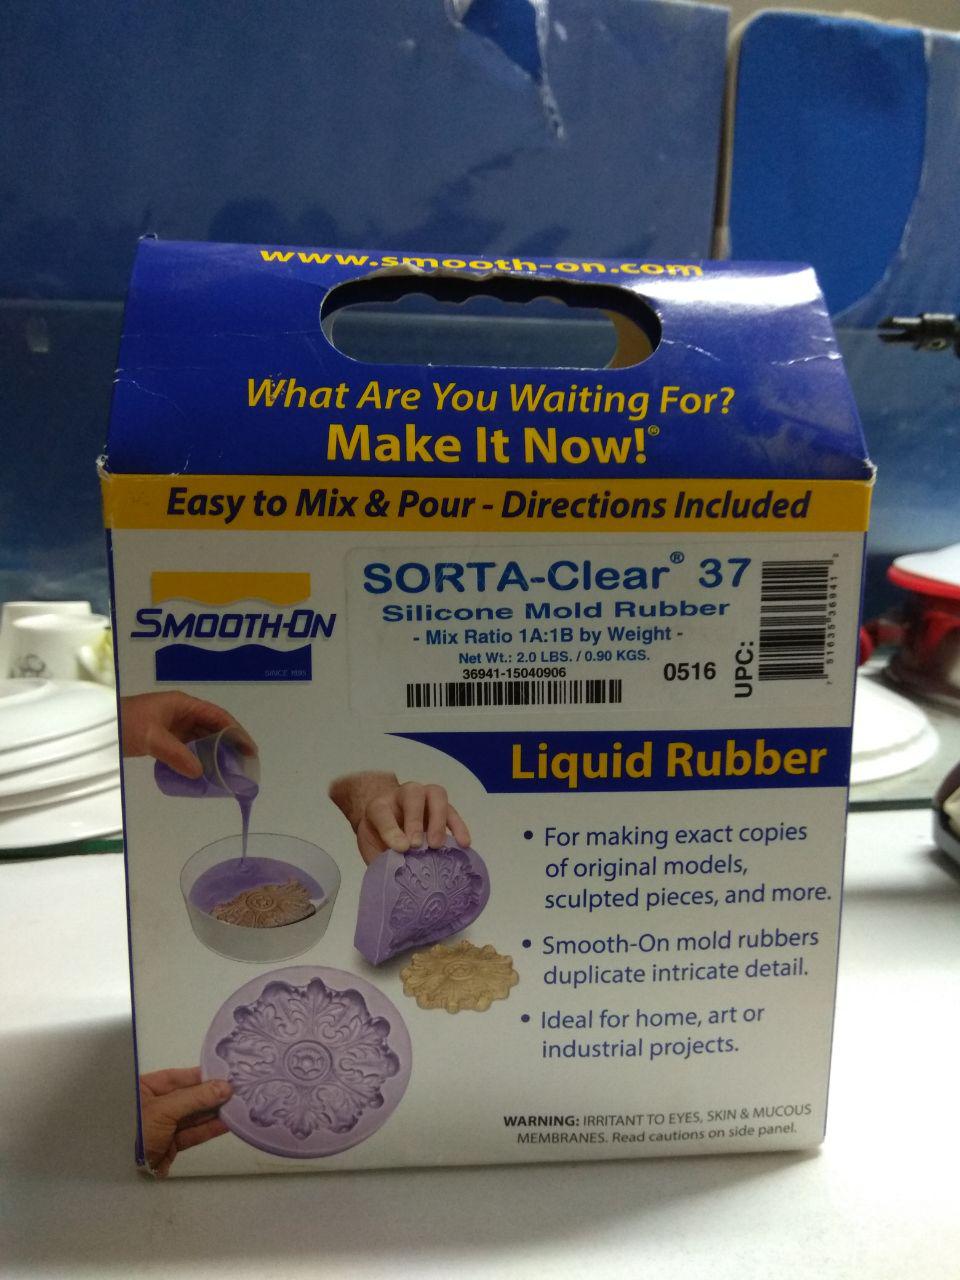
Sorta Clear 37 has Shore 37A hardness and features high tensile and tear strength. This product also offers the convenience of a 1A:1B by volume mix ratio.
It's silicones are ideal for making prototype, jewelry or other molds of any configuration where model visibility is important (i.e. extracting a model from the mold via cutting). Materials such as urethane, epoxy or polyester resins can then be cast into SORTA-Clear™ silicone without application of a release agent. Other materials such as wax and low melt metal alloys can also be cast into SORTA-Clear™.
SORTA-Clear™ can be pigmented with SILC Pig™ silicone pigments.
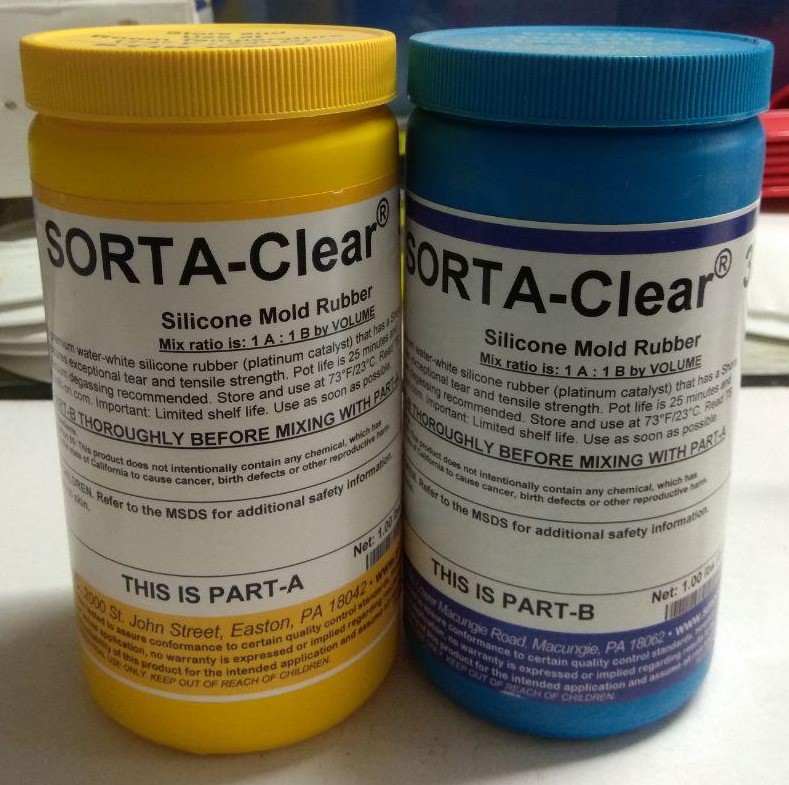
It's 1A:1B by volume mix ratio.

so we need to take equal amount of Part A and Part B.
Mix Part A and Part B
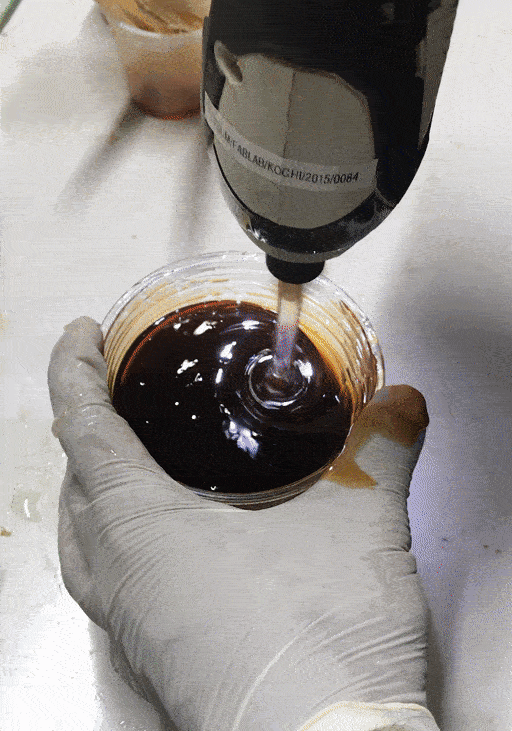
After mixing slowly pour the mix into the mold.

Now the mold is ready.
DESIGN AND MILLING ERRORS
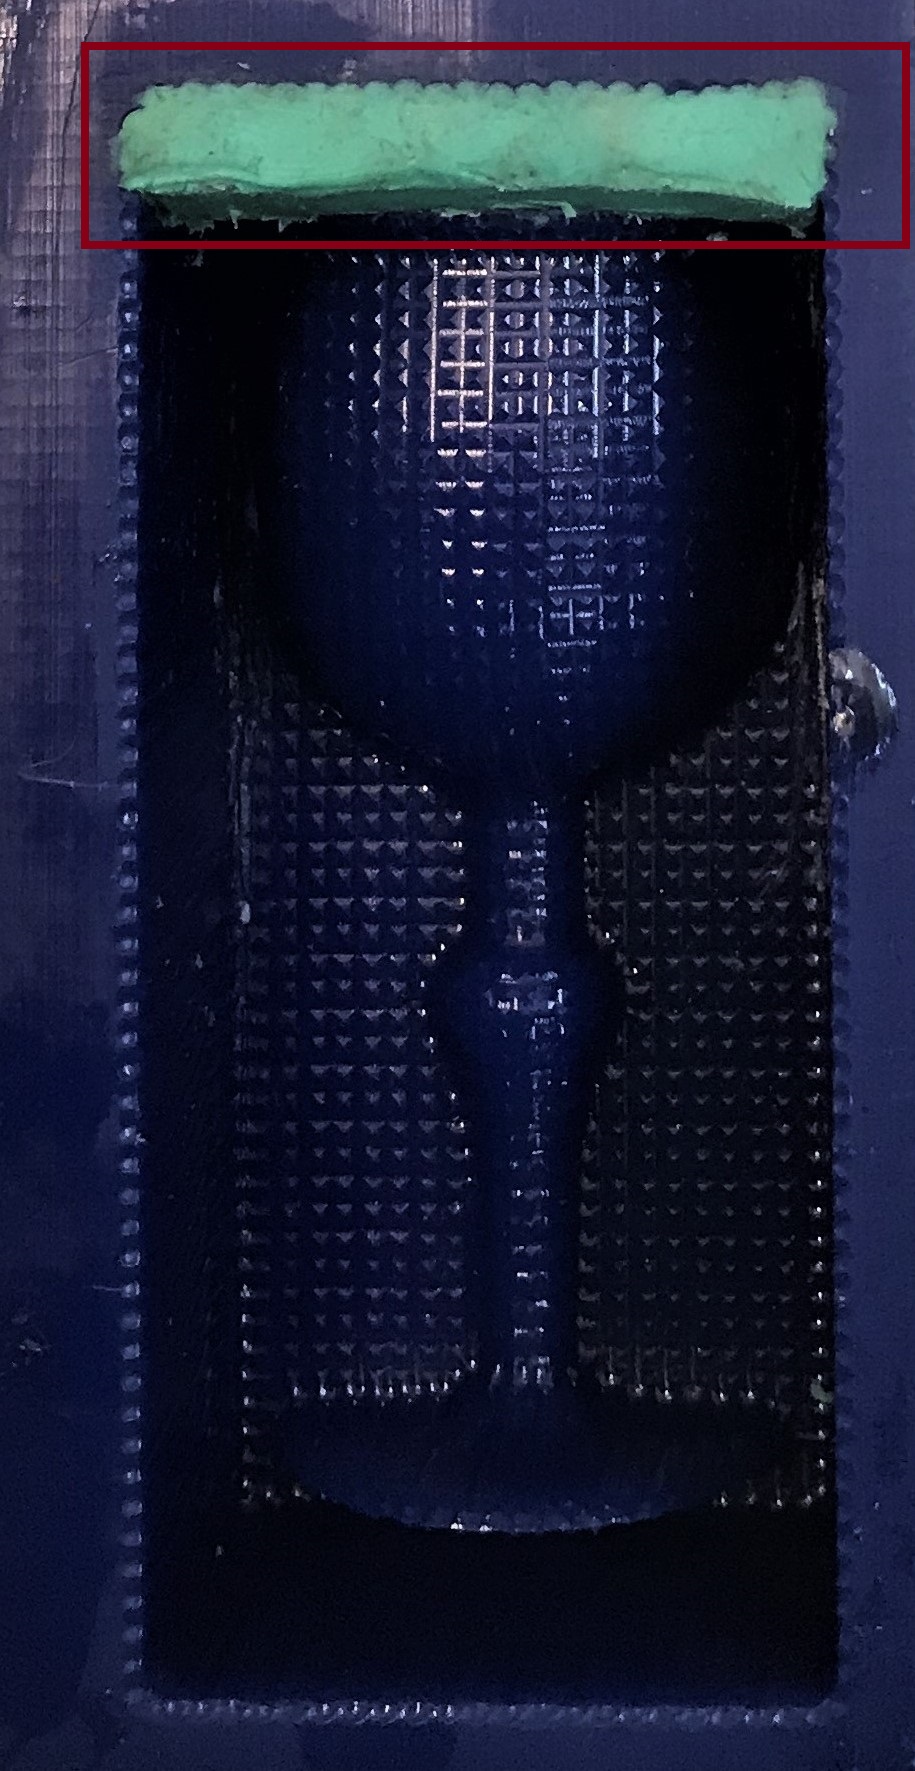
The glass which is to be milled in wax should have been placed at tha top of the wax without clearance.
Since i have clearance in my wax block the resin may fill the top portion of the glass.This will result a design fault in my negative mold.
I used clay to fill the top of the glass and outer boundary.
 |
 |
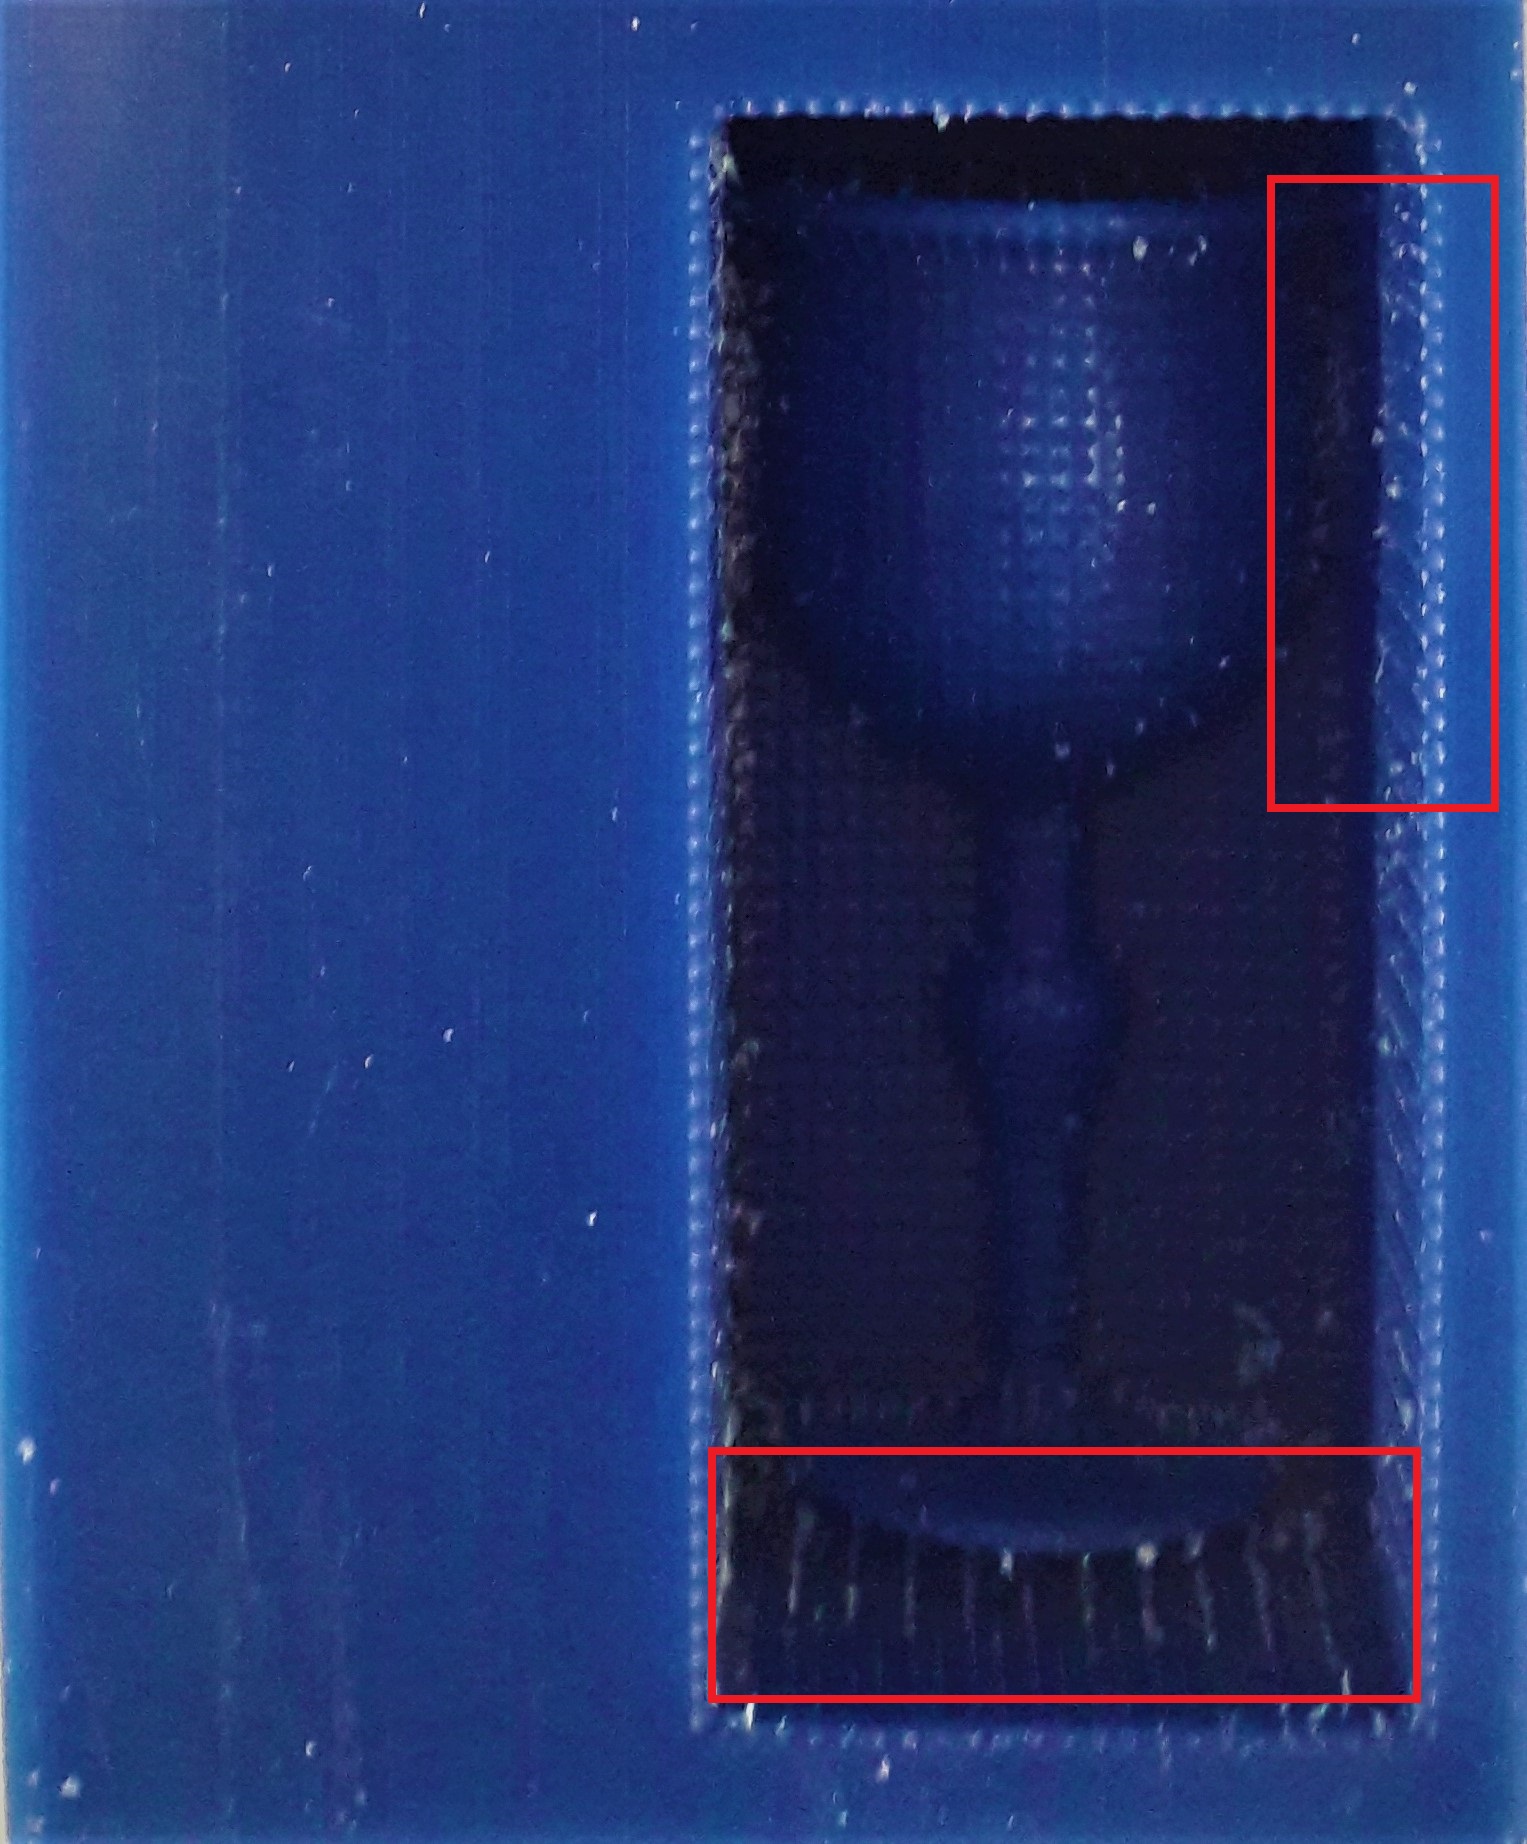
The total clearance around is glass is too less.This can cause errors during casting.
I waited for 8 hrs and now I got our Neagative mold.
Casting the Mold:
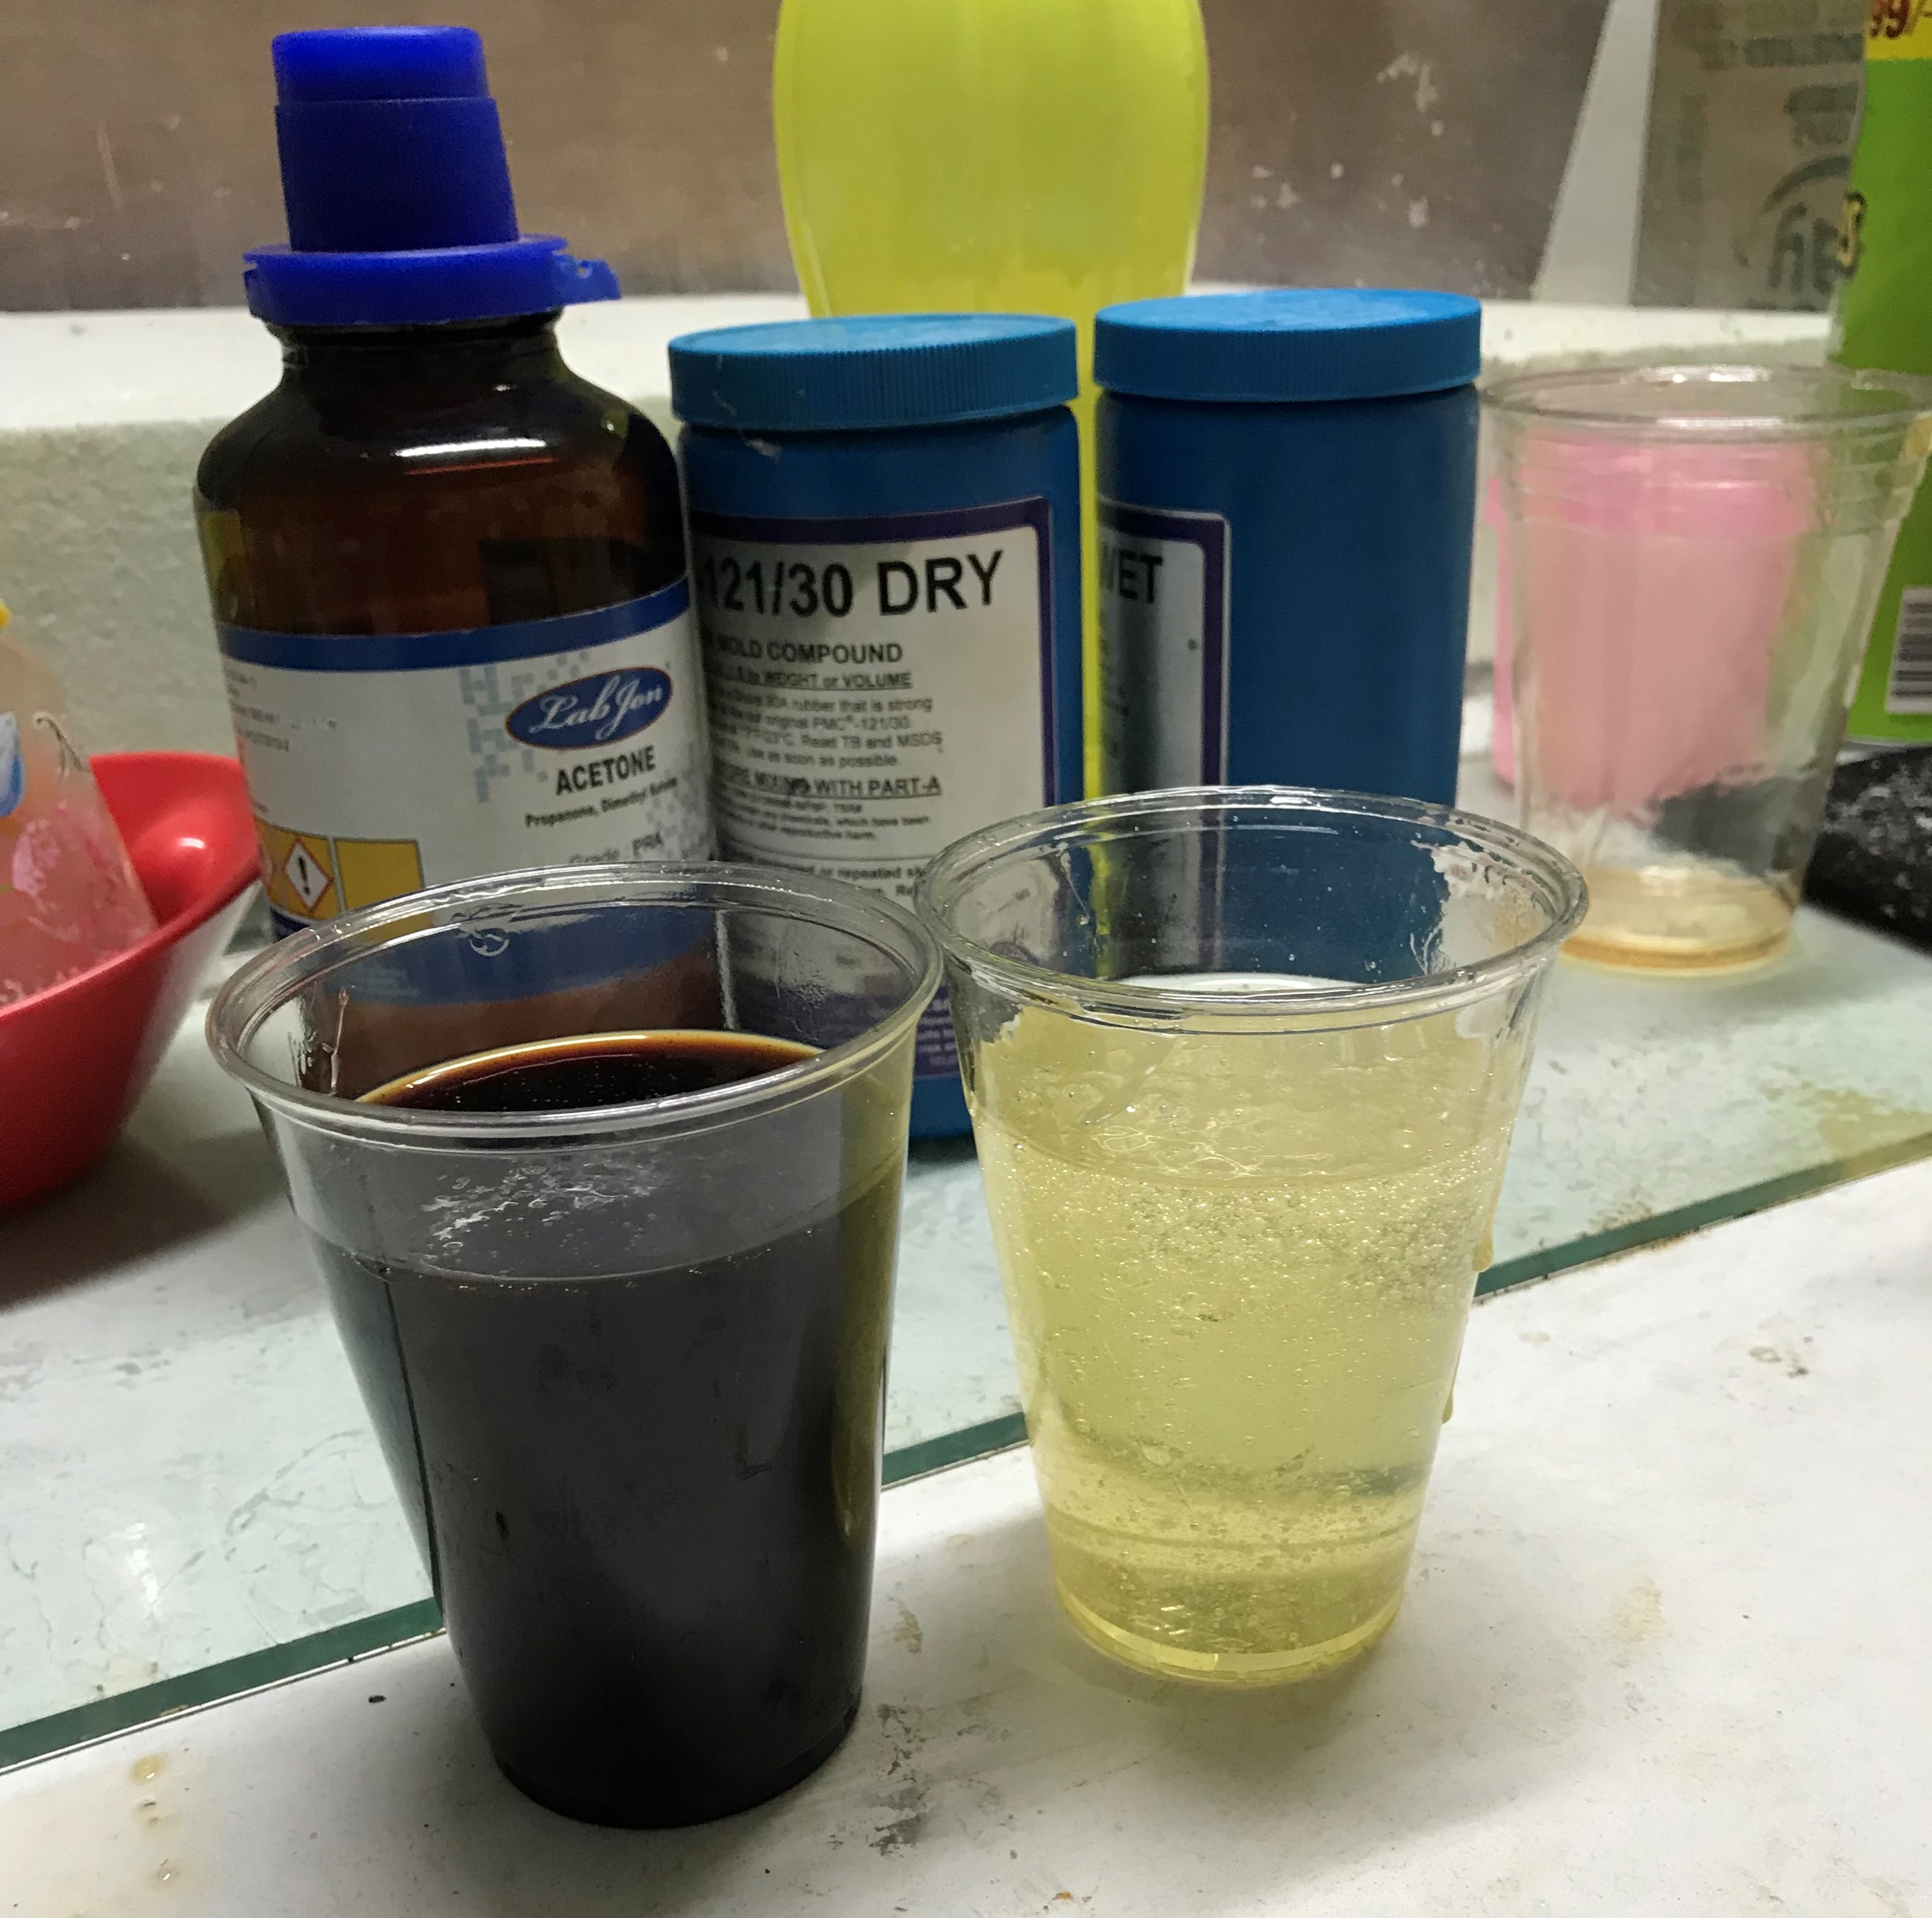
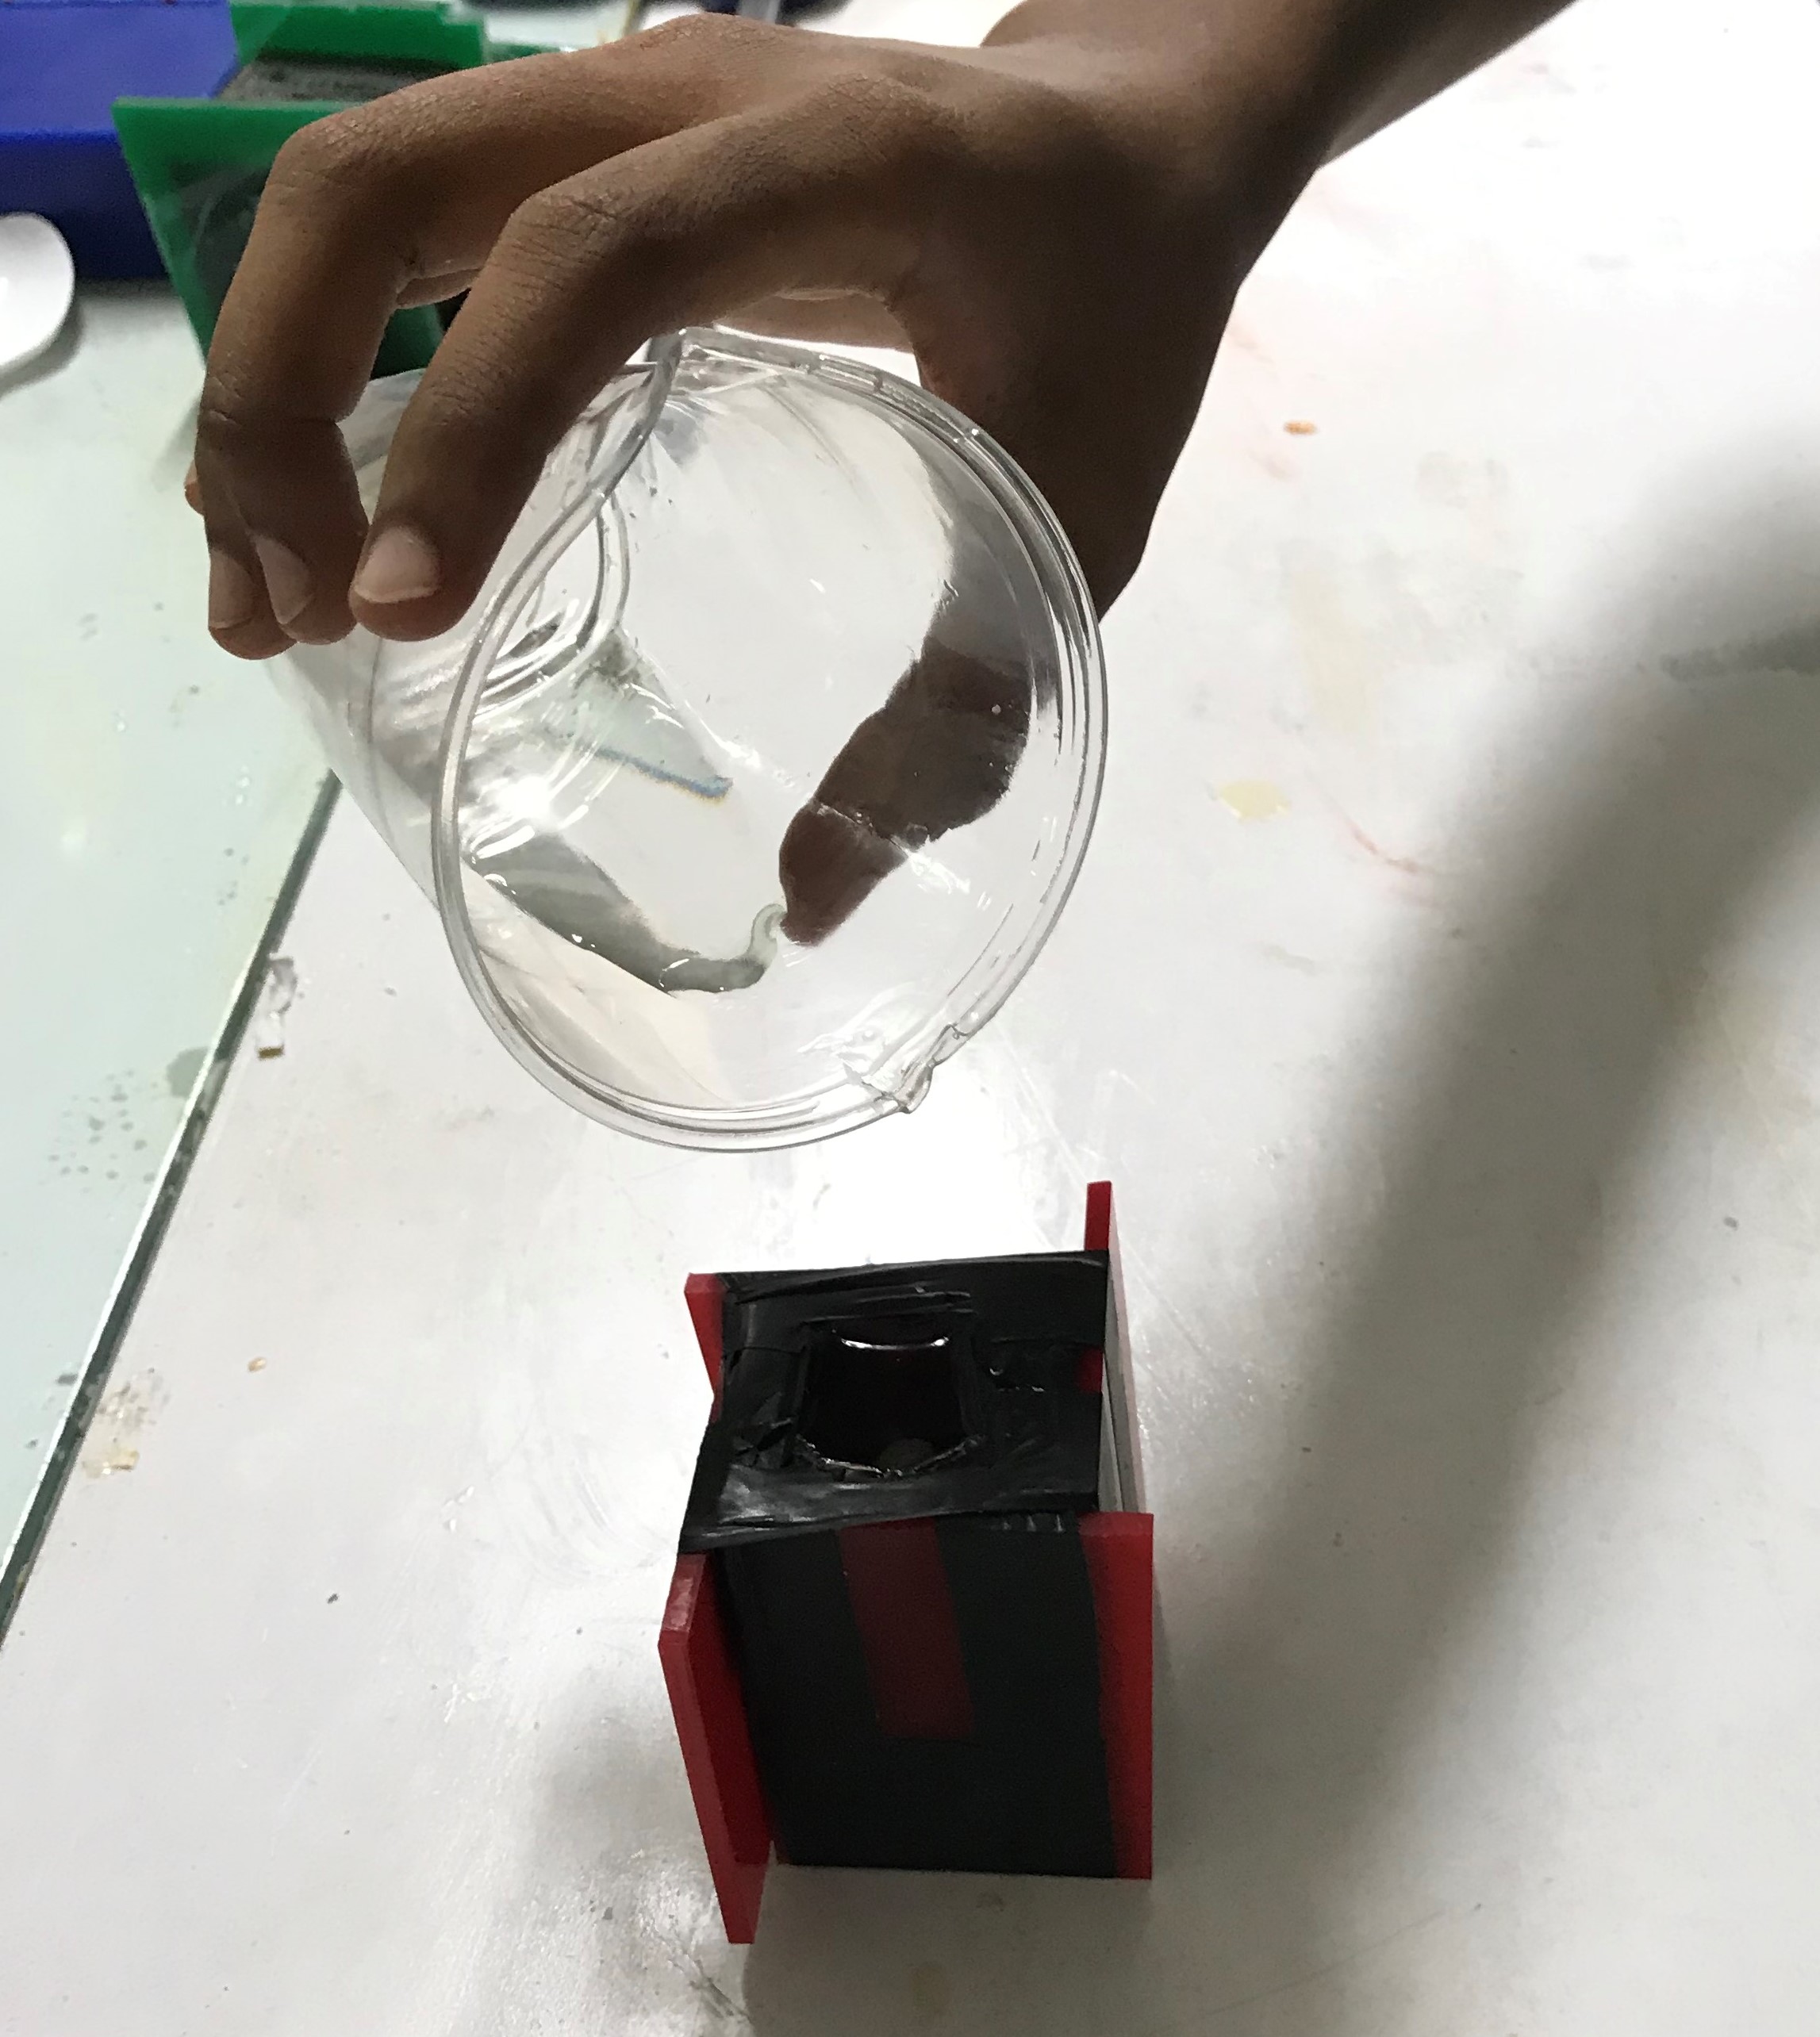
1. Prepare your material and tools.Calculate roughly the amount of silicon you need and pour it in the cup.
It also have a mixing ratio in which we have to mix the resins. It specifically said that the ratio is 2:1 accoring to grams.
Now it is mixed very well.Pour the mixture in the mold.
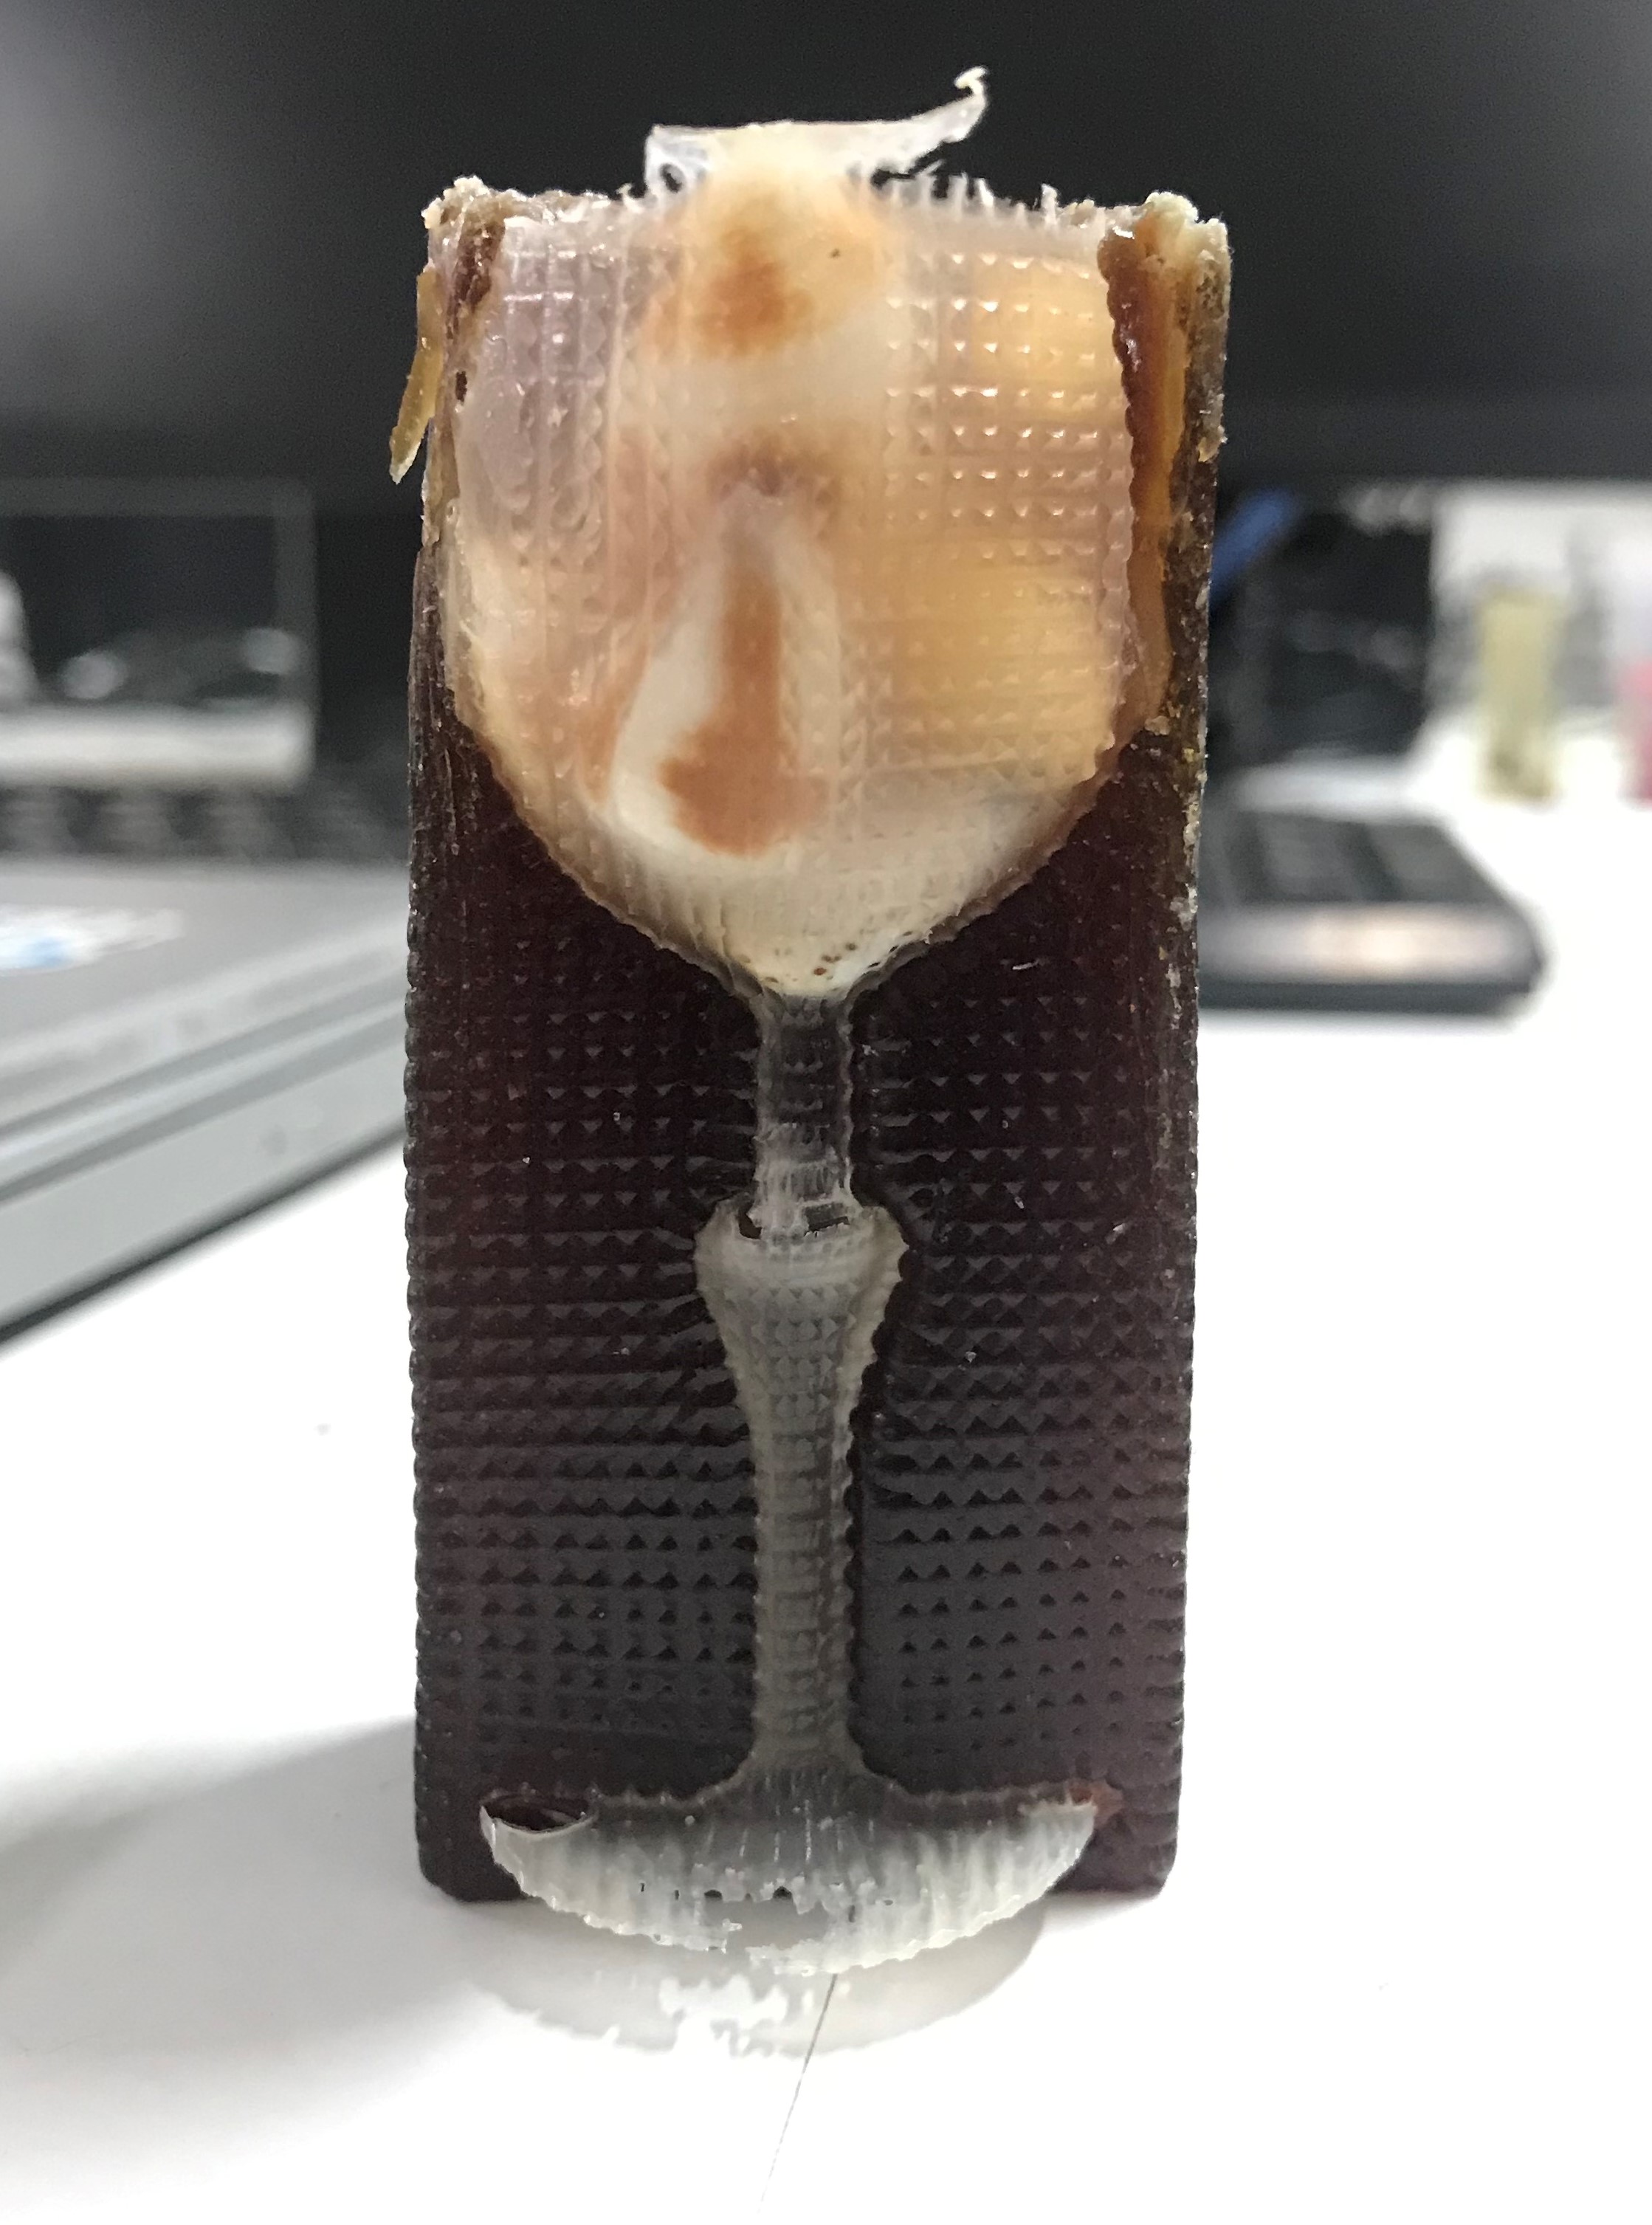
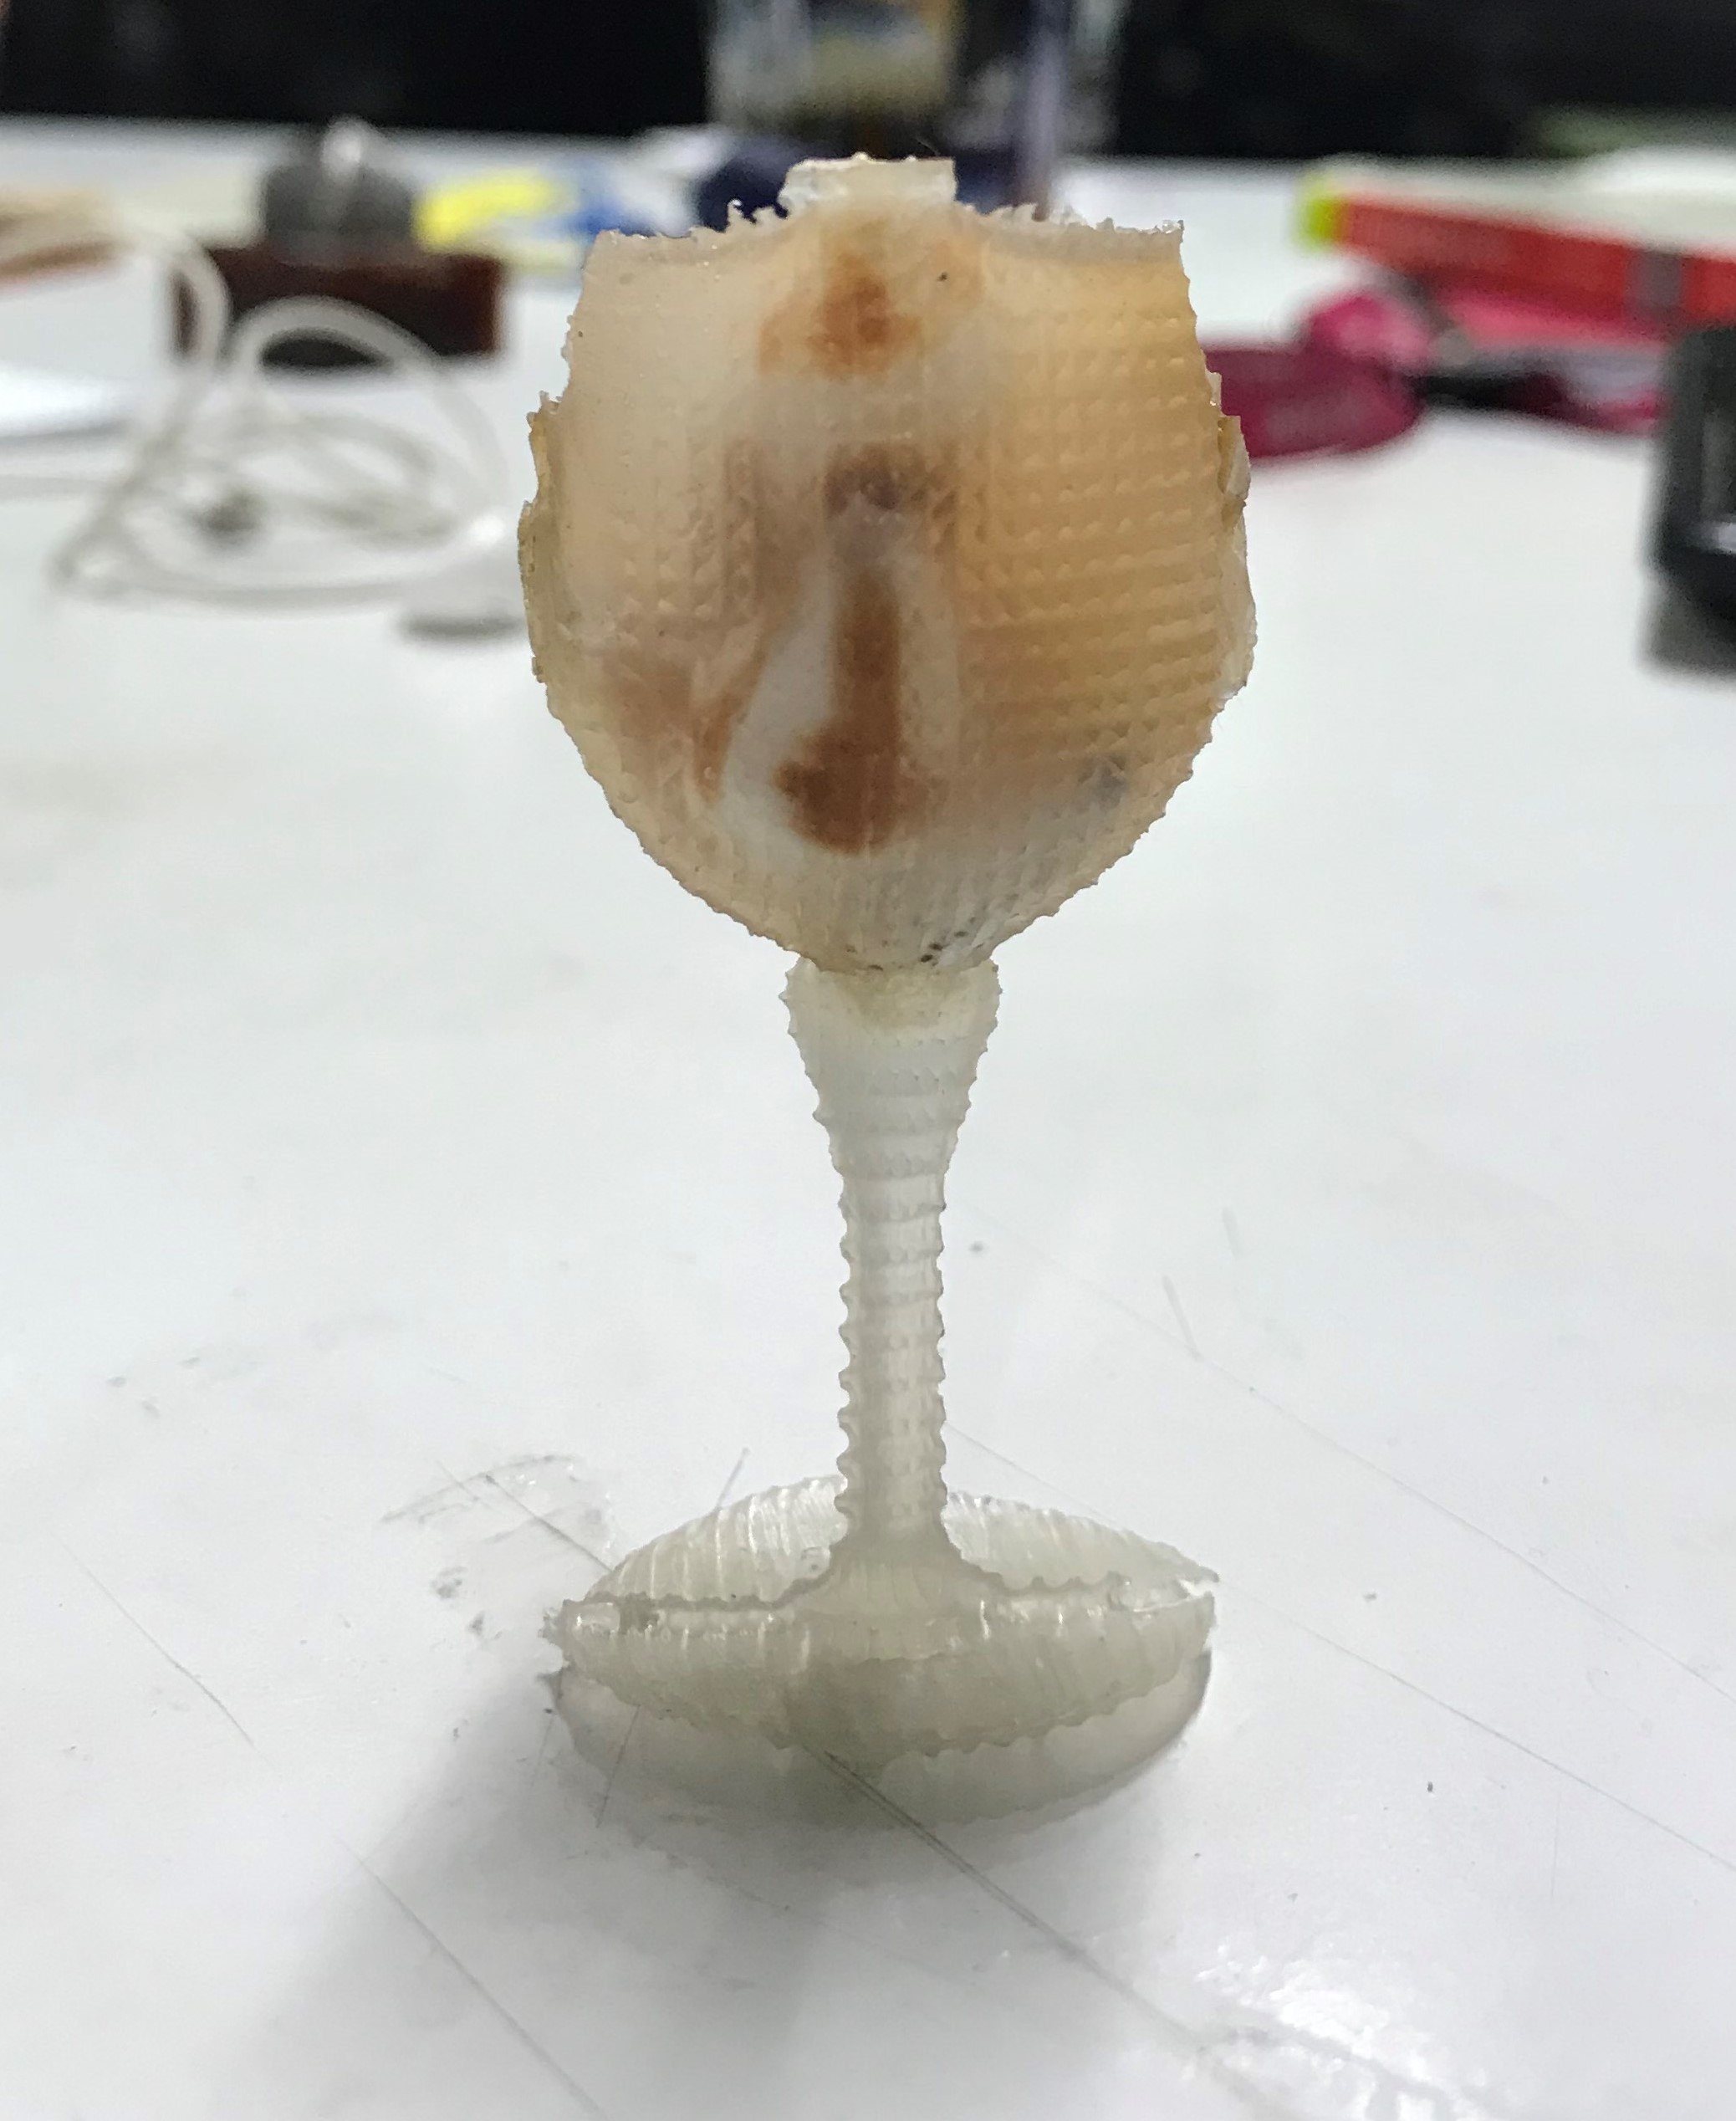
Final Model
You can download the whole project from here.
Group Assignment
Review the safety data sheets for each of your molding and casting materials, then make and compare test casts with each of them.
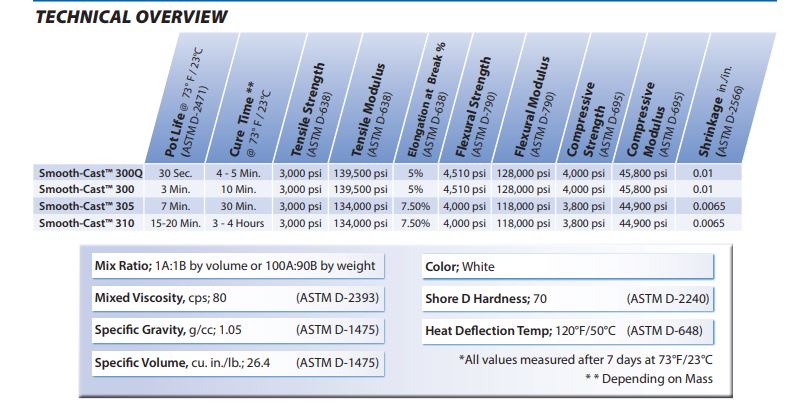
Smooth Cast
The Smooth-Cast™ 300 Series of liquid plastics are ultra-low viscosity casting resins that yield castings that are bright white and virtually bubble free. Vacuum degassing is not necessary. They offer the convenience of a 1A:1B by volume or 100A:90B by weight mix ratio. The differences between them are pot life and demold time
Instructions
Materials should be stored and used in a warm environment (73° F / 23° C). These products have a limited shelf life and should be used as soon as possible. All liquid urethanes are moisture sensitive and will absorb atmospheric moisture. Mixing tools and containers should be clean and made of metal, glass or plastic. Mixing should be done in a well-ventilated area. Wear safety glasses, long sleeves and rubber gloves to minimize contamination risk. Because no two applications are quite the same, a small test application to determine suitability for your project is recommended if performance of this material is in question.
A release agent is necessary to facilitate demolding when casting into or over most surfaces. Use a release agent made specifically for mold making (Universal® Mold Release or Mann’s Ease Release® 200 available from Smooth-On or your Smooth-On distributor). A liberal coat of release agent should be applied onto all surfaces that will contact the plastic.
To ensure thorough coverage, apply release and brush with a soft brush over all surfaces. Follow with a light mist coating and let the release agent dry for 30 minutes. Smooth-On silicone rubber molds usually do not require a release agent unless casting silicone into the mold. Applying a release agent will prolong the life of the mold.
Liquid urethanes are moisture sensitive and will absorb atmospheric moisture. Mixing tools and containers should be clean and made of metal, glass or plastic. Materials should be stored and used in a warm environment (73°F/23°C). Stir or shake both Part A & Part B thoroughly before dispensing. After dispensing equal amounts of Parts A and B into mixing container (100A:90B by weight) and mix thoroughly. Stir deliberately making sure that you scrape the sides and bottom of the mixing container several times. Be careful not to splash low viscosity material out of the container.
(Source:https://www.smooth-on.com/products/smooth-cast-300/)
Remove source(s) of contamination and move victim to fresh air. If breathing has stopped, give artificial respiration, then oxygen if needed. Contact physician immediately.
Flush eyes with plenty of water. If irritation persists, seek medical attention. Skin Contact: In case of skin contact, wash thoroughly with soap and water.
Do not induce vomiting unless instructed by a physician. Never give anything by mouth to an unconscious person.
The material safety data sheet you find Here
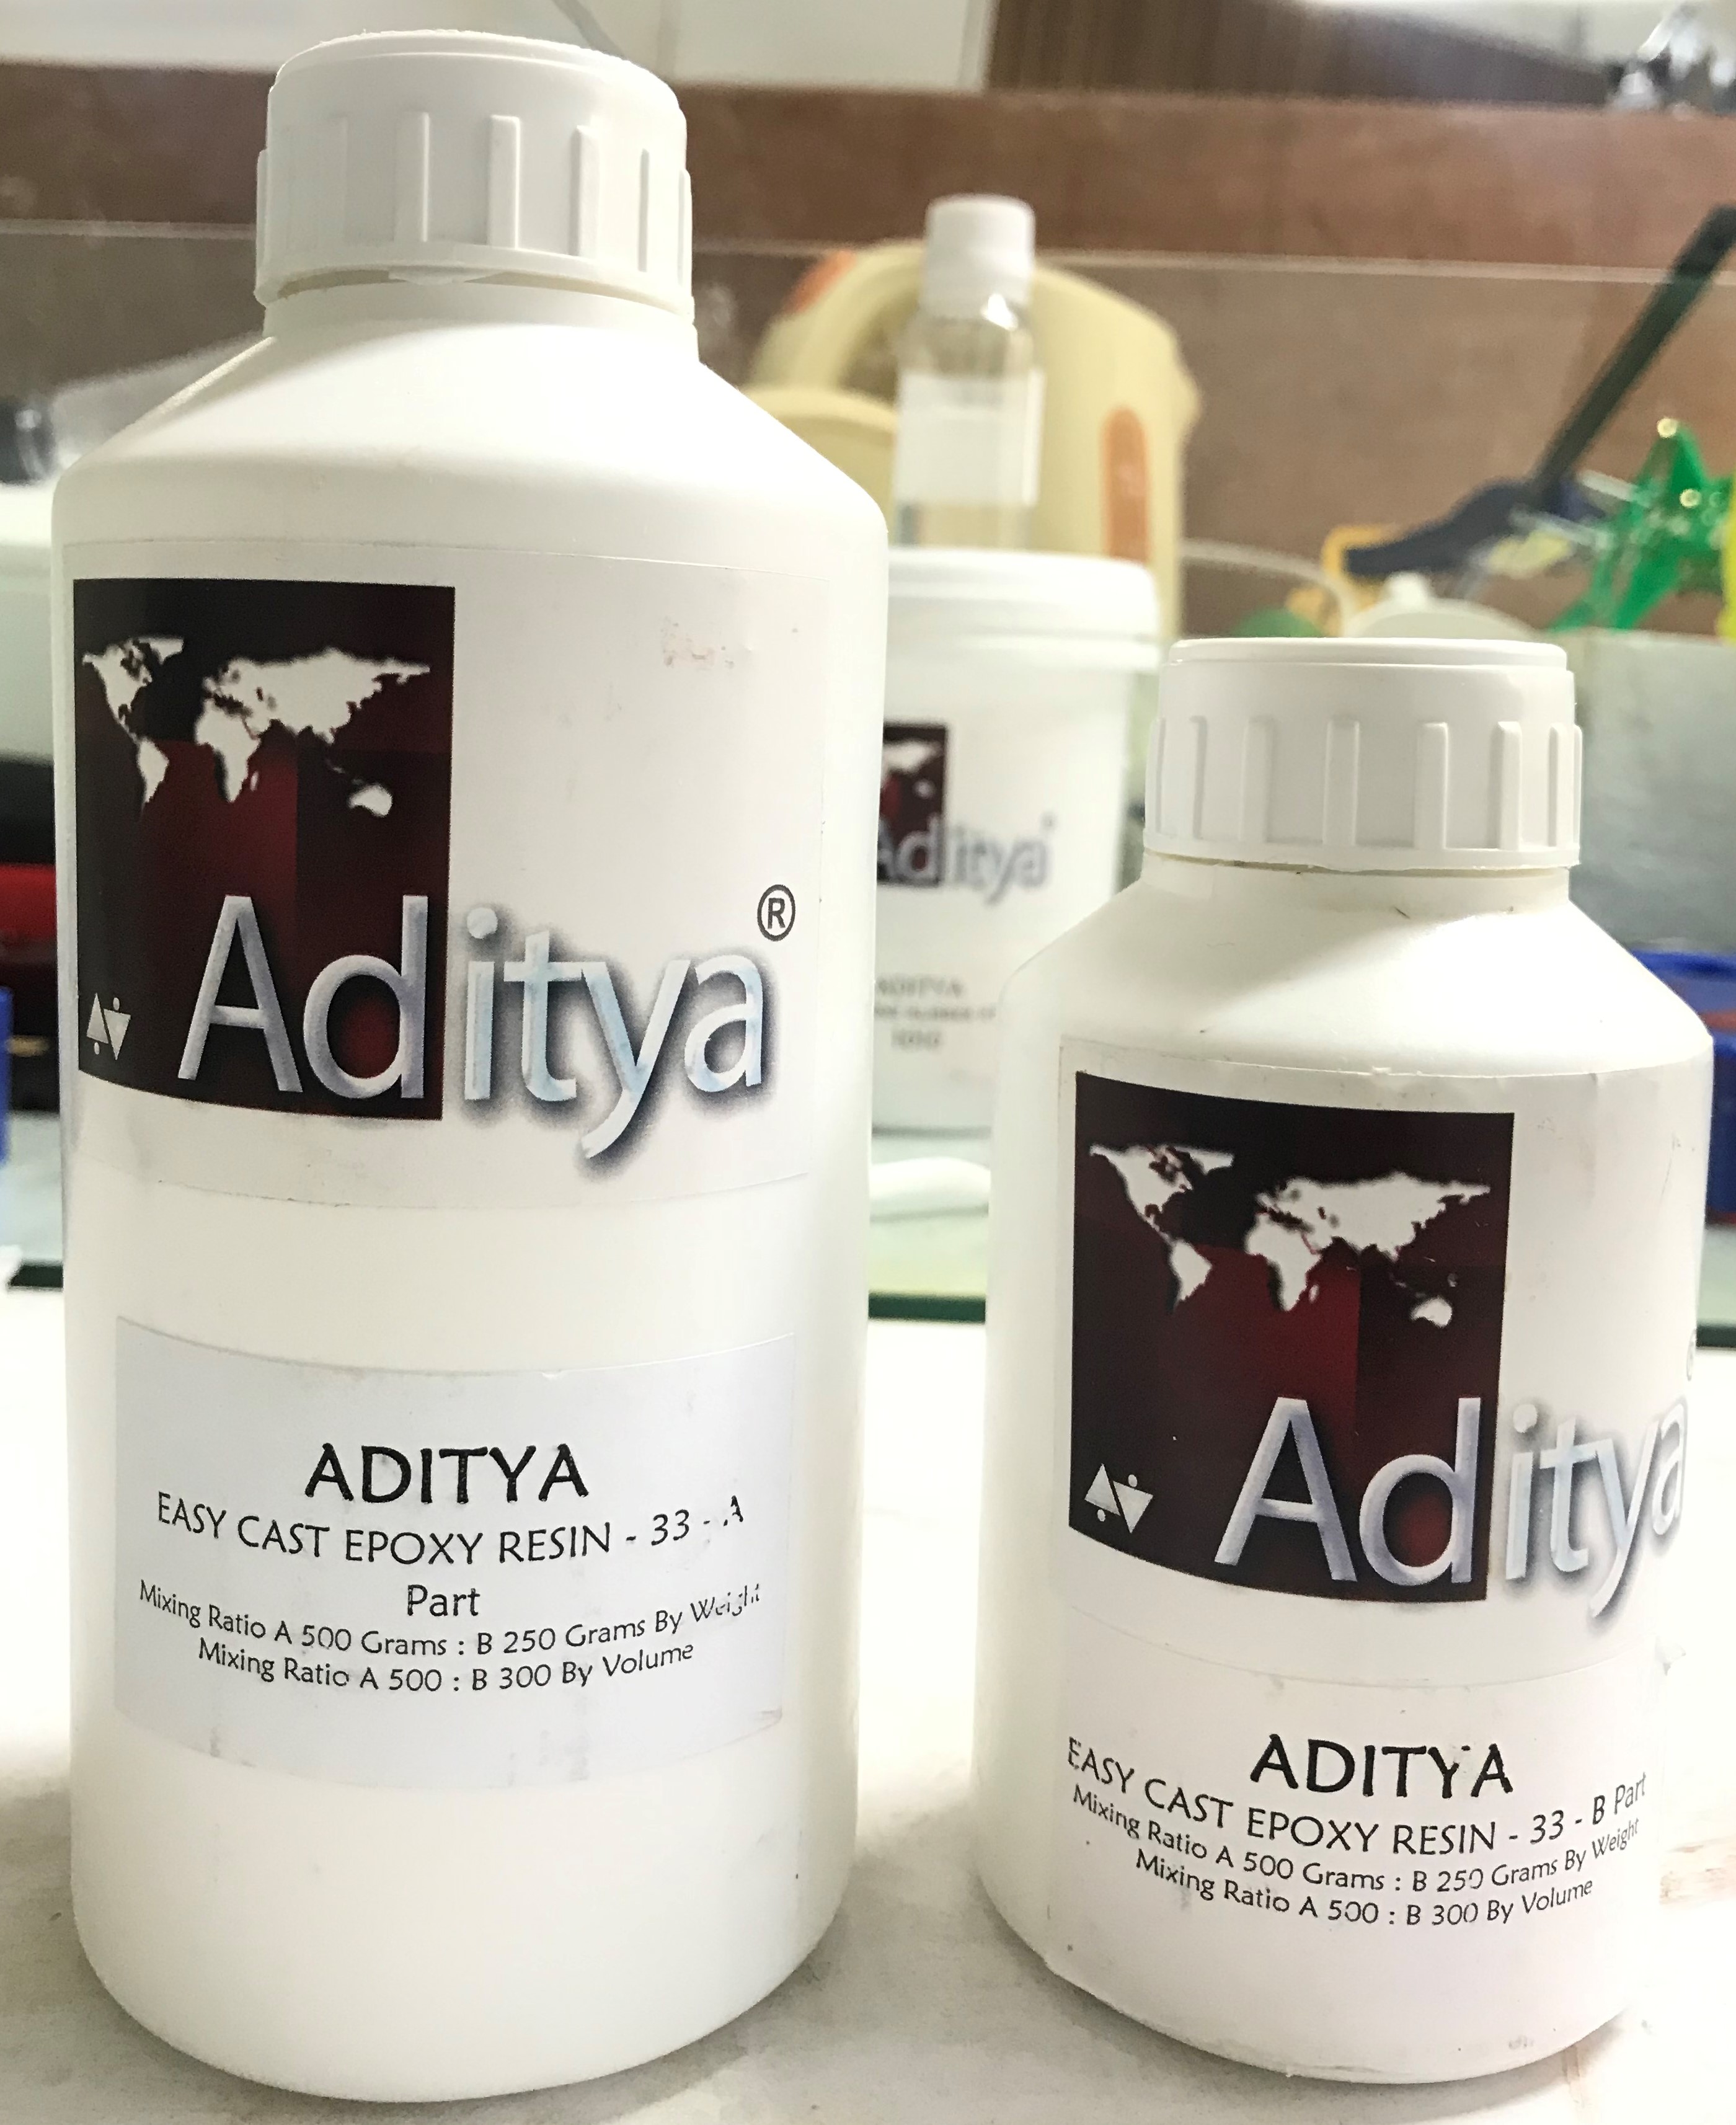
Casting Resin
For casting we are using Aditya Easy Cast Transparent Epoxy Resin - 33-750gm. It is very easy to use.
Description
Aditya Transparent Epoxy Resin is specially created for embedding and making small statue's casting. Ratio in Grams not ml....A Part 100 grams : B Part 50 Grams